Tag Archive | Icing

Cranberry Tangerine Cookies

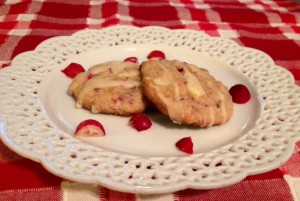
Plated cookiesA very fond memory I have of growing up in Germany is of baking cookies during the holidays. A popular German tradition is holiday cookie baking, where families will spend several days or even weeks preparing for the holidays by baking dozens and dozens of cookies and lining them in prepared holiday tins. When visiting friends and family you bring a box of cookies as a present and often receive one back. German cookies tend to be less sweet than a typical American cookie and often filled with fruit and nuts. This recipe for Cranberry Tangerine Cookies is inspired by the German cookies you could expect in your tin. Filled with cranberries, almonds, and tangerine, they’re the perfect bit of sweet treat you want.

Cranberry Tangerine Cookies
Yields 4 dozen cookies

Ingredients:

  • 1 cup butter, softened
  • 1 cup white sugar
  • 1/2 cup packed brown sugar
  • 1 egg
  • 1 teaspoon grated tangerine zest
  • 2 tablespoons tangerine juice
  • 1/4 teaspoon almond extract
  • 3 cups flour
  • 1/2 teaspoon baking soda
  • 1/2 teaspoon salt
  • 2 cups fresh cranberries, roughly chopped
  • 1/2 cup toasted almonds, chopped (you can also use walnuts or pecans if you prefer)

Icing

  • 1/2 teaspoon grated orange zest
  • 3 tablespoons tangerine juice
  • 1 1/2 cups confectioners’ sugar

 Directions: 

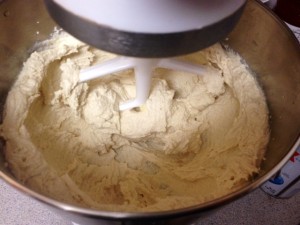
1. Preheat oven to 375°. In a large bowl, cream together butter and the brown and white sugar for several minutes.

sugar and butter creamed together

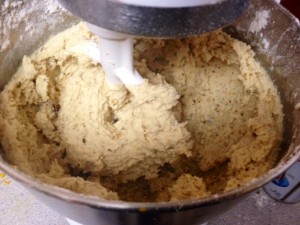
Add the egg, tangerine zest and juice, almond extract, and mix well. Gradually add the flour, baking soda, and salt until well incorporated.

dough with flour

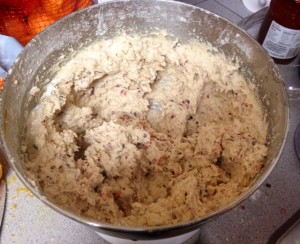
Stir in the cranberries and almonds.

dough with pecans and cranberries

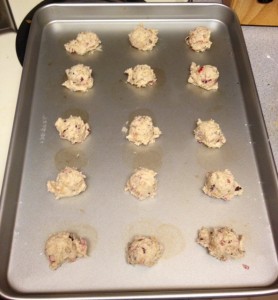
2. Using a cookie scoop or tablespoon, scoop rounded tablespoons of cookie dough on ungreased cookie sheets and bake for 12-14 minutes. Since every oven varies slightly, I always recommend you bake one cookie all by itself to see exactly how long you need. Better to accidentally ruin one cookie than an entire tray!

dough on cookie sheet


baked cookies

3. Transfer from cookie sheet to a cooling rack.

4. While cookies are cooling, mix together the ingredients for the icing.

ingredients for glaze

Using a fork or a whisk, drizzle icing over the cookies.

Iced cookies

Allow icing to set before transferring to cookie tins or eating. Enjoy!
Plated cookies

Hello Kitty Cake

I love Hello Kitty! She’s such a cute cartoon and I love seeing her become more popular in the U.S. I recently hosted a Hello Kitty Birthday party and it was so much fun to decorate and bake for it. Party City had a lot of really cute decorations that I picked up and then I bought the rest from Amazon. The Hello Kitty cake was the centerpiece and definitely the hit of the party!

Hello Kitty Cake

It was more work than I anticipated but I had a blast making it. Wilton provides their own directions but I found them to be a bit over the top so my simplified version is below. Here’s what you’ll need:

  1. Wilton Hello Kitty Cake Pan
    Wilton Hello Kitty Cake PanWilton Hello Kitty Cake Pan
  2. Cake Mix
    • I vote funfetti or strawberry but you can do whatever floats your boat!
  3. 3 cups Butter Cream Icing for everything except the eyes, nose, whiskers, and bow
  4. Red, Black, and Yellow Icings
    • You can use Butter Cream again but I selected plain white to help the features pop a little more and to make sure the colors really blended well. You can use food coloring or if you want the official Wilton pre-colored frostings they are: Red-Red, Black, Lemon Yellow and Golden Yellow. I didn’t even want to attempt making black frosting so I did buy that pre-colored. You only need a little bit for the features (maybe 1/2 cup total) so I bought one little tub of white icing.
  5. Round and rosette tips
    • I happened to have a round tip but you could also stick with just a bag trimmed in the corner if you don’t have the round tips.
  6. Decorating Bags
  7. Parchment paper
    • To tuck under the cake while icing. You can also use paper towels in a pinch.

Directions:

Preheat oven to 350°F. Grease and flour your pan and set aside. Mix the cake mix batter according to the directions on the box. Pour batter into prepared pan, making sure to spread to make sure it’s evenly distributed. Gently lift pan and tap once or twice on the counter to release any little air bubbles. Bake for 35-40 minutes or until a toothpick inserted in the middle comes out clean. Let cake cool for 10 minutes or until you can touch the metal pan. Prior to removing, take a large knife and trim off the raised portion of the cake, using the sides of the pan as your leveler. Flip and remove cake from pan. Cake should come out easily but if necessary you can always run a plastic knife or plastic spatula around the edges to help loosen it. Let cake cool completely before frosting or else you’ll end up with a very Sad Kitty!

Icing Time!
Coloring the icing isn’t an exact science so plan on a little chemistry fun. Plan on 1/2 cup for the red and literally a heaping spoonful for the black and yellow. Then start adding your drops until you are happy with the color. Before you start icing the cooled cake, be sure you have it laid out on the platter or cake plate you plan to present it on. Then tuck in the parchment paper under the cake to keep the plate nice and clean in case any frosting decides not to stay on Kitty. 🙂
Start with the bow by using red icing and the round tip to pipe the inside loop of the bow. I just did two big globs and patted them down with my fingers (pat your finger in corn starch first if the frosting is too sticky). Then use the rosette tip to fill in the rest of the bow in red. Outline the inside and outside of the bow with black icing using the round tip. Then do the whiskers and nose in black icing with the round tip. Fill in the nose using yellow icing and the round tip. Just like the bow, do a big glob and then flatten down with your finger. Now the fun part! I do recommend taking a break at this part or planning on taking a couple short breaks during what comes next: filling out what’s left in butter cream with the rosette. You can start at any point you want but any brown cake bit that’s showing needs a tiny white rosette. This is the part that is brutal but the end result is gorgeous. Once done, remove the parchment paper, pat yourself on the back, and pour yourself a glass of wine.

Now you’re ready for a Hello Kitty Party or an awesome Friday night! 🙂
Hello Kitty Cake2