Tag Archive | quick

Best Ever Butterscotch Oatmeal

oatmeal in bowl

This really is the best oatmeal recipe. Ever. Seriously. There isn’t any butterscotch, butter (or scotch, for that matter!) but you’d swear it is sinfully delicious because of how creamy, smooth, and rich butterscotch-ity it tastes.

This has been my go-to breakfast for about 6 weeks now because of how hearty, delicious, and QUICK it is to make. To save even more time, what I usually do is make a double batch for us at the start of the week and then store it in the fridge to heat up as needed. An extra splash of milk when reheating brings it right back to life and it is just pure heaven. I’ve also mixed things up by adding various toppings like dried fruit, sautéed apples, cinnamon, bananas, and chocolate chips. I hope you enjoy!

Best Ever Butterscotch Oatmeal
Serves 6

Ingredients:

Directions:

1. In a medium-sized pot over medium heat, whisk together the milk, egg, and brown sugar, stirring constantly to avoid the egg from curdling. Whisk for several minutes until the mixture is frothy.

whisking milk and egg

2. Add the oats and stir until thickened, a few minutes.

oatmeal in pot
3. Remove from heat and serve!
oatmeal in bowl

This recipe is adapted from an AllRecipes post.

Nutella Thumbprint Cookies

image_4Anything is better with Nutella, right? Well that’s certainly the case with these little tasties. A rich buttery cookie is taken straight to heaven when rolled in coconut and a lovely gem of nutella placed in the center. It’s actually a really easy cookie to whip up and oh so yummy. A great cookie recipe for holiday baking or cookie exchanges and it will quickly become a family favorite. Yummy to the max!

Nutella Thumbprint Cookies
Yields 36 cookies

  • 3 sticks (3/4 pound) butter, softened
  • 1 cup sugar
  • 1 teaspoon vanilla
  • 3 1/2 cups flour
  • 1/2 teaspoon salt
  • 1 egg beaten with 1 tablespoon water, for egg wash
  • 7 ounces sweetened flaked coconut
  • Nutella (the amount depends on how generous you are but you’ll need approximately 1/2 cup)

Directions: 

1. In a mixer, cream together the butter sugar for several minutes.

image

Add the vanilla and gradually add the flour and salt until well combined.

image_2

2. Transfer the dough onto a piece seran wrap, form into a large ball, and refrigerate for 30 minutes to chill. If you’re in a hurry you can also pop it in the freezer for 5-10 minutes.

Dough in seran wrap

3. Preheat oven to 350°. Form the chilled dough into balls, approximately 1 1/4 inches, or weighing 1 ounce if you’re using a scale.

Rolled dough into balls

Dip the balls into the egg wash, roll in flaked coconut, and transfer to an ungreased cookie sheet. Use your finger or thumb to form an indentation in the dough for filling with Nutella. 🙂

rolled balls in coconut

Using a teaspoon, fill each indentation with about 1/4 teaspoon of Nutella.

filled with nutella

4. Bake for approximately 20-25 minutes or until the edges are a light brown and the coconut is toasted. Since all ovens vary slightly, I always recommend baking one cookie first to see what the exact time is to avoid burning an entire sheet.

baked nutella cookies

5. Transfer cookies to a wire cooling rack. Eat the cooled Nutelal Thumbprint Cookies with a glass of milk or hot cocoa. Enjoy!

Plated Cookies

Crock Pot Copycat P.F. Chang’s Mongolian Beef

Mongolian Beef PlatedIf you’ve ever eaten at P.F. Chang’s, you know you’re always in for a treat. Everything on their menu is so stinking good. Unfortunately, the closest P.F. Chang’s we have is about 45 minutes away so it’s rare that we get to enjoy eating there. I love, love, love their Mongolian Beef so it was a happy day when I came across the recipe in one of Todd Wlbur’s copycat books. While it was pretty close to spot on I have made some changes which I think make it taste more like the original and also make the recipe crockpot-friendly. The result is to die for! The beef is tender and tangy and the sauce it cooks in thickens up nicely to pour over rice or noodles. It’s an easy crock pot recipe to put together in the morning and the smells you come home to are heavenly. I hope you enjoy the recipe as much as my family does! And if you like a little heat, try adding some Sriracha to the sauce. 🙂

Crock Pot Copycat P.F. Chang’s Mongolian Beef
Serves 4

  • 1 pound flank steak or london broil
  • 1/2 cup cornstarch
  • 4 large green onions, sliced into 1 inch chunks
  • 1 teaspoons olive oil
  • 1 teaspoon sesame seed oil
  • 1 teaspoon freshly grated ginger
  • 4 garlic cloves, finely minced
  • 1/2 cup soy sauce
  • 1/4 cup Hoison sauce
  • 1/2 cup water
  • 3/4 cup dark brown sugar
  • 1/4 cup toasted sesame seeds (optional)
  • Green Onions, finely sliced for garnish

Directions: 

1. Turn your crock pot on low while you start preparing the ingredients. Spray the interior of your crock pot with non-stick cooking spray.

2. Cut the steak into thick stir-fry size pieces, making sure to cut against the grain of the meat.

Whole Steak


Sliced Meat

Dredge the pieces of steak into the cornstarch, making sure both sides are well coated.

Dredged Pieces

Place the coated steak in the bottom of the crock pot and discard any leftover cornstarch.

Dredged Pieces in Crockpot

3. Layer sliced green onions over the steak.

Green Onions over steak

4. In a small mixing bowl, combine remaining ingredients and whisk until well blended.

Sauce mixture

Pour sauce over the steak. Cook on HIGH for 2-3 hours or on LOW for 4-5 hours.

Sauce over steak

Serve over rice or noodles and garnish with green onions. Enjoy!

Mongolian Beef Plated

Honey Wheat Crescent Rolls

Plated roll

Bread baking is of my many passions. There’s something magical about combining just a few simple ingredients, applying a little love, and transforming it into a loaf of crusty bread. I must have been a baker in another life cause I really could spend all day baking bread.
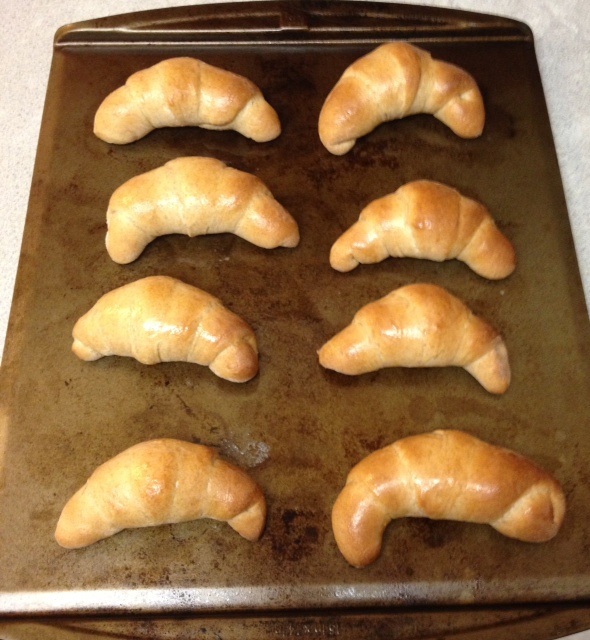
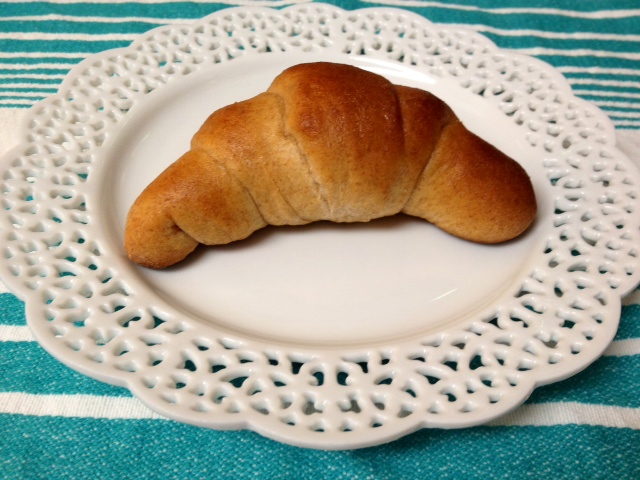
For family holidays and special gatherings, I usually make my homemade crescent rolls. They pair perfectly with ham and turkey or just a slathering of good jam. Instead of my traditional white, I’ve played with a wheat version which is actually lighter and more flavorful. I tend to shy away from most wheat breads, which I think often taste like cardboard, so if you don’t typically like wheat then I will bet this recipe will win you over!

**Directions for using either a bread machine or making by hand are included below.**

Honey Wheat Crescent Rolls
Makes approximately 24 rolls

  • 1/2 cup warm water
  • 1/2 cup warm milk
  • 1 egg
  • 1/3 cup butter, softened
  • 1/4 cup white sugar
  • 1/4 cup honey
  • 1 teaspoon salt
  • 2 cups whole wheat flour (I highly recommend King Arthur)
  • 1 3/4 cups all-purpose flour
  • 1 (.25 ounce) package active dry yeast
  • 1/4 cup butter, melted (for basting rolls when they come out of the oven)

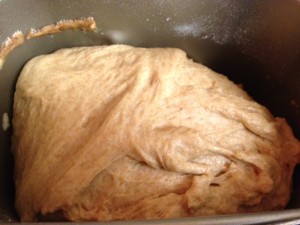
1. Combine ingredients in the pan of a bread machine according to your machine’s instructions.

2. Set to dough and complete cycle, allowing it to rise once.

photo

3. Continue below “By Hand Directions” for next steps.

By Hand Directions for Dough:

1. In a small bowl, combine warm water, yeast, and one teaspoon of sugar. Mix together and let stand for 10 minutes. Yeast will activate and get frothy.

2. In a separate large bowl, combine remaining sugar and rest of dry ingredients. Make a well in the center and pour the yeast mixture and remaining ingredients in. Mix to form dough and knead until smooth, approximately 10 minutes.

3. Spray a bowl with cooking spray or lightly oil, place the dough in the bowl, making sure to coat the whole ball with oil. Allow to rise in a warm place until doubled, approximately an hour.

Directions continued for either making “By Hand” or “Bread Machine”:

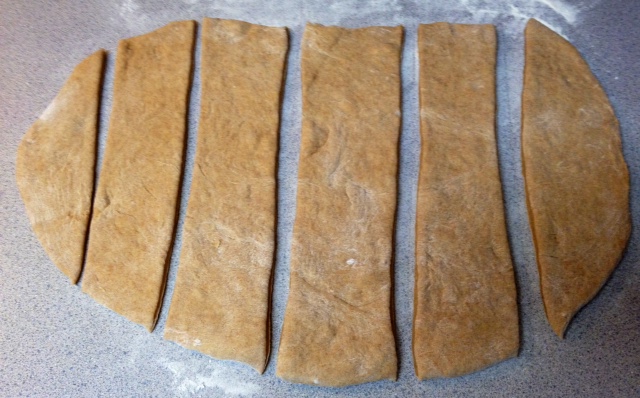
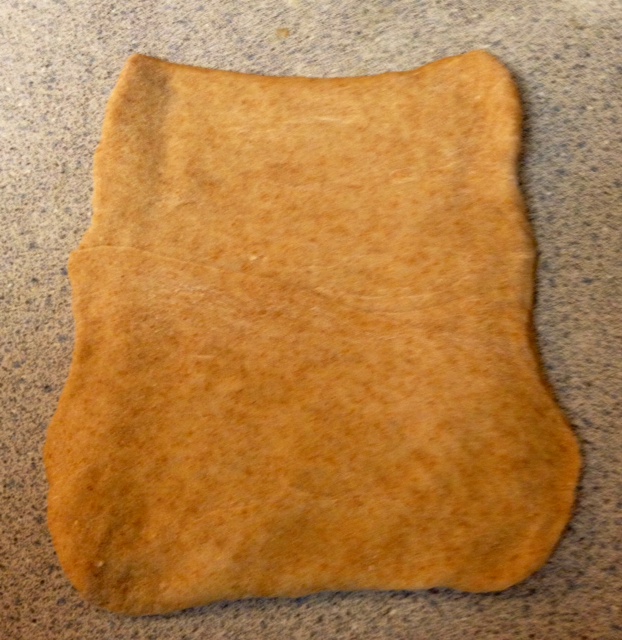
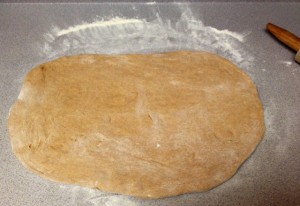
4. Pour dough onto a floured surface and roll out into a large rectangle, approximately 1/4″ thick.

Rolled dough

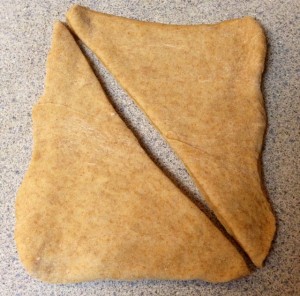
Using a pizza cutter, slice the dough into 3-4″ strips.

Dough in strips

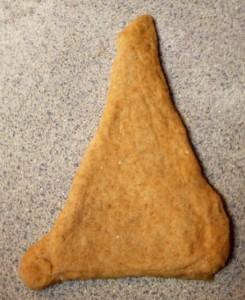
Cut the strips into small rectangles and then cut at the diagonal to form a triangle.

Small squares

Square cut into triangles

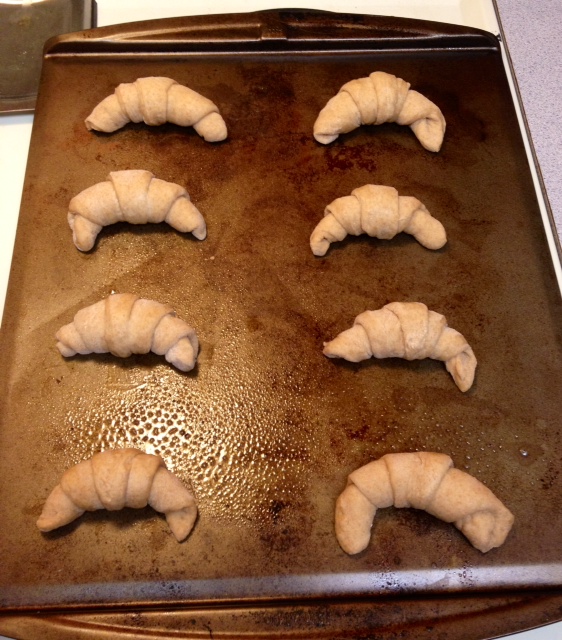
5. Starting with the base of the triangle, roll the dough up to the point.

Triangle


Rolled up crescent

Use a little bit of water to seal the top and then lay on a greased baking sheet.Water to seal edges

rolled crescent roll


rolled crescent roll

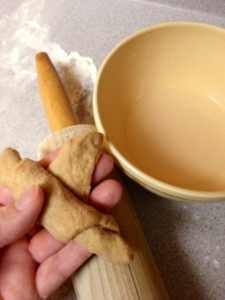
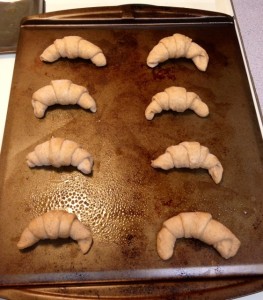
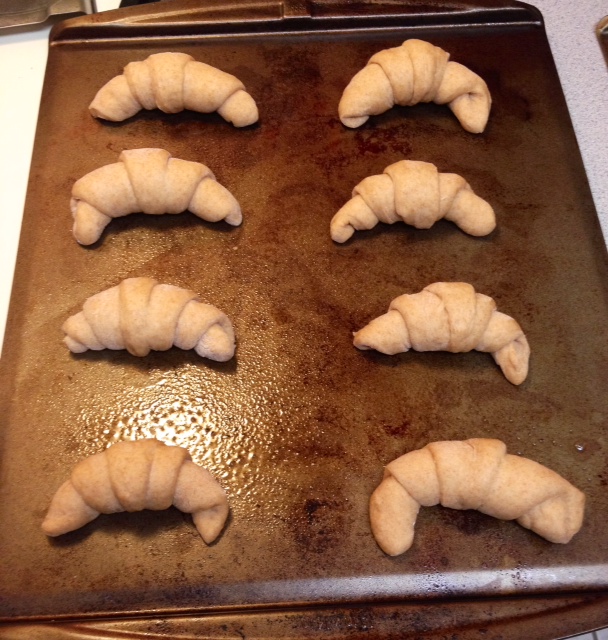
6. Allow the crescent rolls to rise in a warm place for 30 minutes to an hour.

Risen rolls

7. Preheat oven to 375°. Bake the rolls one sheet at a time for 9-12 minutes, or until golden brown. Helpful Tip: Since all ovens vary slightly, I strongly recommend baking one roll all by itself to determine your oven’s exact baking time. Better to throw out one burned roll than an entire pan!

Buttered rolls

8. Baste the warm rolls with the melted butter and enjoy!


4 Ingredient Crock Pot Balsamic Pot Roast

Plated Pot Roast I’ve made many a pot roast and this is the easiest and tastiest recipe. I came across this winning recipe in a magazine and after making it a few times thought I’d mix it up a bit by adding in balsamic vinegar. The result was even better than the already awesome pot roast recipe! The balsamic both tenderizes and flavors the meat while giving it a nice tangy zip. The best part is that I can throw everything in the crock pot before work, without having to sear the meat like most recipes require, and dash out the door. No joke, it takes less than 5 minutes to prep or a few minutes more if you decide to add veggies to the pot. Can a recipe be any simpler or any more rewarding?

Crock Pot Balsamic Pot Roast
~Serves 4. If you’re cooking for more then you’ll definitely want to double the recipe.

  • 2 pound boneless chuck roast
  • 1 (10.75 ounce) can condensed cream of mushroom soup
  • 1 package dry onion soup mix
  • 1/4 cup balsamic vinegar
  • 1/4 cup water
  • Your favorite pot roast veggies (optional)

1. Place chuck roast in the bottom of your crock pot.

Meat in crock pot

If you like, add optional veggies such as carrots, potatoes, parsnips, etc. Any softer veggies like celery, peas, etc. should be added two hours or so before serving so they don’t turn to mush on you.

With Veggies

2. In a small bowl, mix together the mushroom soup, onion soup mix, water and vinegar.

Mixed soup

Pour over the pot roast.

Sauce over meat and veggies

Cook on Low for 8-9 hours or on High for 3-4 hours. If you go the shorter method and decide to add veggies, be sure to check the veggies to make sure they’re cooked through.

Finished crock pot

Remove roast to a cutting board and allow to cool a bit before slicing. Be sure to slice against the grain! If you slice with the grain it’s almost guaranteed it’ll be chewy.

Meat ready to carve

Helpful Tip: This recipe makes a wonderful gravy which I often pour over egg noodles or mashed potatoes. The men in my family love that combination!

Plated Pot Roast

Easy Oven-Baked BBQ Chicken

BBQ Chicken

There’s nothing quite like some finger-lickin’ BBQ chicken for dinner. The only problem is when you don’t want to worry about firing up the grill. No worries! This recipe packs all the flavor punches of a traditional grilled BBQ chicken into a simple baked version. We’re talking 40 minutes from start to finish! The secret is cranking up the heat at the beginning to get that crispy skin, then smothering in your favorite sauce and dropping the heat. I love how quick and easy it is—perfect for a weekday meal. It’s also one super economical family meal since you can use inexpensive leg quarters, drumsticks, or a whole chicken cut into pieces.

Easy Oven-Baked BBQ Chicken
Servings are for one whole chicken, cut into pieces but you can easily adjust portions.

  • 4 pounds chicken pieces, with skin on
  • 2 teaspoons garlic powder
  • 2 teaspoons salt
  • 1 teaspoon paprika
  • 1 teaspoon pepper
  • 1 bottle of good BBQ sauce

Directions:

1. Preheat oven to 450°F. Line a baking dish with aluminum foil and place a baking rack over it. Make sure the dish has a lip on it to catch the chicken drippings! Spray rack with cooking spray.

Baking rack on foil-lined pan

2. Clean chicken pieces and pat dry with paper towels. Arrange chicken pieces on the rack. Sprinkle with garlic powder, salt, pepper, and paprika.

Seasoned raw chicken

3. Bake chicken for 35 minutes or until skin is crispy and internal temperature is 165°F. Remove chicken from oven and reduce oven temperature to 350°F.

Baked chicken without sauce


4. Baste chicken with barbecue sauce and bake for 5 additional minutes.

Sauced chicken


5. Remove from oven and baste with more sauce. Allow chicken to cool sufficiently and dig in!

BBQ Chicken


Crab Rangoon Dip

Crab Rangoon DipI cannot get enough Crab Rangoon. Also known as crab wontons, traditional crab rangoon is made by filling an egg roll wrapper with cream cheese, crab, and green onions, pinching to make a little fan and frying until golden and delicious.Traditional Crab Rangoon So if you adore crab rangoon as much as I do then you will go crazy for this crab rangoon dip, which requires no frying and takes just a few minutes to throw together. I’ve made it for dinner and office parties, girls’ nights, and potlucks and always gets rave reviews, even from those who claim they don’t care for crab.

Crab Rangoon Dip
*This recipe was adapted from a Pampered Chef recipe.
16 Servings

  • 8 ounces cream cheese, softened
  • 2 garlic cloves, minced
  • dash of salt and pepper
  • 1 cup swiss cheese, shredded
  • 1 14 oz. jar sweet and sour sauce (I doubled the original amount listed cause I felt it needed more but if you prefer less sweet and sour sauce then feel free to adjust to suit your taste)
  • 8 ounces imitation crabmeat, roughly chopped
  • 1/4 cup green onion, thinly sliced
  • 1 bag of pita chips or preferred dipping chip

Directions: 

1. In a small bowl, combine cream cheese, minced garlic, and salt and pepper and blend until smooth. Add half of the crabmeat and swiss cheese and combine.

Bowl of cream cheese mixture

2. Spread mixture into the bottom of a 1-2 quart baking dish.

Spread cream cheese into a baking dish

Sprinkle remaining crab meat over cream cheese.

crab meat over cream cheese

Pour sweet and sour sauce over the top and microwave uncovered 4-6 minutes.

Sweet and sour over cream cheese

3. Remove from microwave and garnish with green onion. Serve with pita chips for dipping.

Crab Rangoon Dip

There couldn’t be an easier or tastier dip!

Dark Chocolate Cherry Oatmeal Cookies

If you like chewy oatmeal cookies then you’ll love this recipe which incorporates dark chocolate chips, dried cherries, and walnuts. The flavors work really well together and make for a very tasty cookie!

Plated Cookies

Dark Chocolate Cherry Oatmeal Cookies
Makes 2 dozen cookies

Ingredients:

  • 1/2 cup butter, softened
  • 1/4 cup white sugar
  • 1/2 cup packed dark brown sugar
  • 1 eggs
  • 2 teaspoons vanilla extract
  • 2/3 cup all-purpose flour
  • 1/2 teaspoon baking soda
  • 1/2 teaspoon salt
  • 1 & 2/3 cups quick-cooking oats
  • 3/4 cup chopped walnuts
  • 1/2 cup dark chocolate chips
  • 1/2 cup dried cherries

Directions:

Preheat oven to 325°F.

In a medium bowl, cream together the sugars and butter.

Sugar and butter

Add egg and vanilla and beat. Whisk in flour, baking soda, and salt and beat until well blended.

Blended Dough

Stir in the oats, walnuts, chocolate chips and cherries.

Finished Dough

Using a cookie scoop or a large spoon, scoop spoonfuls of cookie dough onto a greased cookie sheet.

Cookies on cookie sheet

Bake for 13 minutes or until cookies are chewy in the center and crispy on the edges.

Note: With any cookie recipe, I strongly recommend you bake one cookie all by itself to test out the exact baking time for your oven. It’s a lot better to pitch one burnt cookie than an entire pan. I’ve learned this lesson the hard way!

Plated Cookies

Chicken Verde Enchiladas

Chicken Verde Enchiladas are a super easy recipe that is deliciously creamy, satisfying, and kid-friendly. This is my go-to recipe to whip up when a friend has a baby or I’m asked to bring a main dish for a potluck. It transports easily and freezes and reheats so well. It’s also a great recipe for using up any leftover cooked chicken you have.

Plated Enchiladas


Chicken Verde Enchiladas
Makes 8 enchiladas

Ingredients:

  • 2 tablespoons olive oil
  • 1 small onion, diced
  • 1 cup mushrooms, diced
  • 4 garlic cloves, minced
  • 1 1/2 cups chicken, shredded
  • 3 cups cheddar cheese, divided
  • 1/2 cup sour cream
  • 1 (15.8 ounce) can Great Northern beans
  • 1/2 teaspoon pepper
  • 1 (10.7 ounce) can cream of mushroom soup
  • 1 cup salsa verde (Find in the salsa aisle or Hispanic foods section of your supermarket)
  • 8 flour tortillas, taco size

Directions:

Preheat oven to 350°F.

In a medium-high heat skillet, sauté onions and mushrooms in olive oil for several minutes, until softened. Add minced garlic and cook for 1-2 minutes and remove from heat. Set aside.

Grilled onions, mushrooms, garlic

In a medium bowl mix together shredded chicken, 1 cup of the cheddar cheese, sour cream, beans, and pepper. Add the grilled onion and mushroom mixture and mix together. Set aside.

Filling

In another bowl, mix together cream of mushroom soup and salsa verde until creamy.

Salsa Verde

Spread a cup of the mixture onto the bottom of a 9×13 casserole dish.

Casserole

Liberally fill each tortilla with the chicken mixture.

Filled tortilla

Roll up and place in the bottom of the casserole dish. Continue with remaining tortillas and filling mixture.

Enchiladas without sauce

Pour remaining mushroom soup/salsa verde mixture all over the filled tortillas.

Enchiladas without cheese

Top with remaining 2 cups of cheddar cheese.

Cheese on enchiladas

Bake for 30 minutes or until cheese is bubbly and starts to brown.

Finished enchiladas

Let cool for 10 minutes and serve.

Plated Enchiladas

Easy Cheesy Steak Taquitos

My boyfriend, Tom, has an unequaled love for taquitos. If he had to eat one meal for the rest of his life, taquitos would happily be on his menu. Unfortunately, the frozen variety are fried and filled with preservatives and all sorts of junk. While frozen are super quick and easy, homemade are actually almost as quick and easy but so much better for you and even better tasting. This is also a super kid-friendly meal so you can get your little helpers in the kitchen. My favorite thing about this meal is that you can use up leftovers to make them by substituting out the meat and veggies for practically anything you have that you need to use up.

Cover

Makes 12 taquitos

Ingredients

  • 1 tablespoon extra virgin olive oil
  • 1 small onion
  • 6 ounces steak, chopped into bite-size pieces
    • I used strip but you can use also use  flat iron, top sirloin, London broil, etc,
  • 1/2 cup of corn
  • 1 cup of Mexican blend cheese
  • 1/4 cup chopped green onion
  • 1/2 cup salsa
  • 2 tablespoons taco seasoning
  • 12 (6-inch) flour or corn tortillas
  • 12 toothpicks
  • Sour cream, guacamole, or salsa for dipping, optional

Directions

Preheat oven to 375°F. Spray a large baking sheet with cooking spray.

In a medium sauté pan, add olive oil and cook onion for 1-2 minutes on medium high heat. Add chopped steak and cook until no longer pink in the center. Remove from heat and allow to cool while you work on the rest of the filling.

Grilled steak and onions

In a small bowl, mix corn, cheese, green onion, salsa, and taco seasoning  until well blended.

Filling mixture, without steak and onions

Mix in the cooled onion and steak mixture.

Filling mixture

To ensure your tortillas are nice and pliable for rolling, wrap the tortillas in a couple damp paper towels and microwave on a plate for 30-45 seconds. This is also a great tip for taco and fajita night!

Working on a cutting board, lay out a tortilla and spread 3 heaping tablespoons of filling all over the tortilla.

Tortilla with filling

Roll up tightly, from bottom to top and fasten the seams with a toothpick. Continue rolling up the rest of the tortillas and then place on the baking sheet, about an inch apart.

Spray the tops of the taquitos with olive oil cooking spray and bake for 15 minutes, or until brown and nice and crispy.

Remove from baking sheet and cool for 5 minutes.

Don’t forget to remove the toothpicks before serving!
Plated Steak Taquitos

I serve with a side of Spanish Rice and little bowls of sour cream, salsa, or guacamole so guests can pick their favorite condiment. This will definitely be a huge hit and is also a great recipe idea for game day nibbles.