Tag Archive | lime

Honey-Glazed Ham

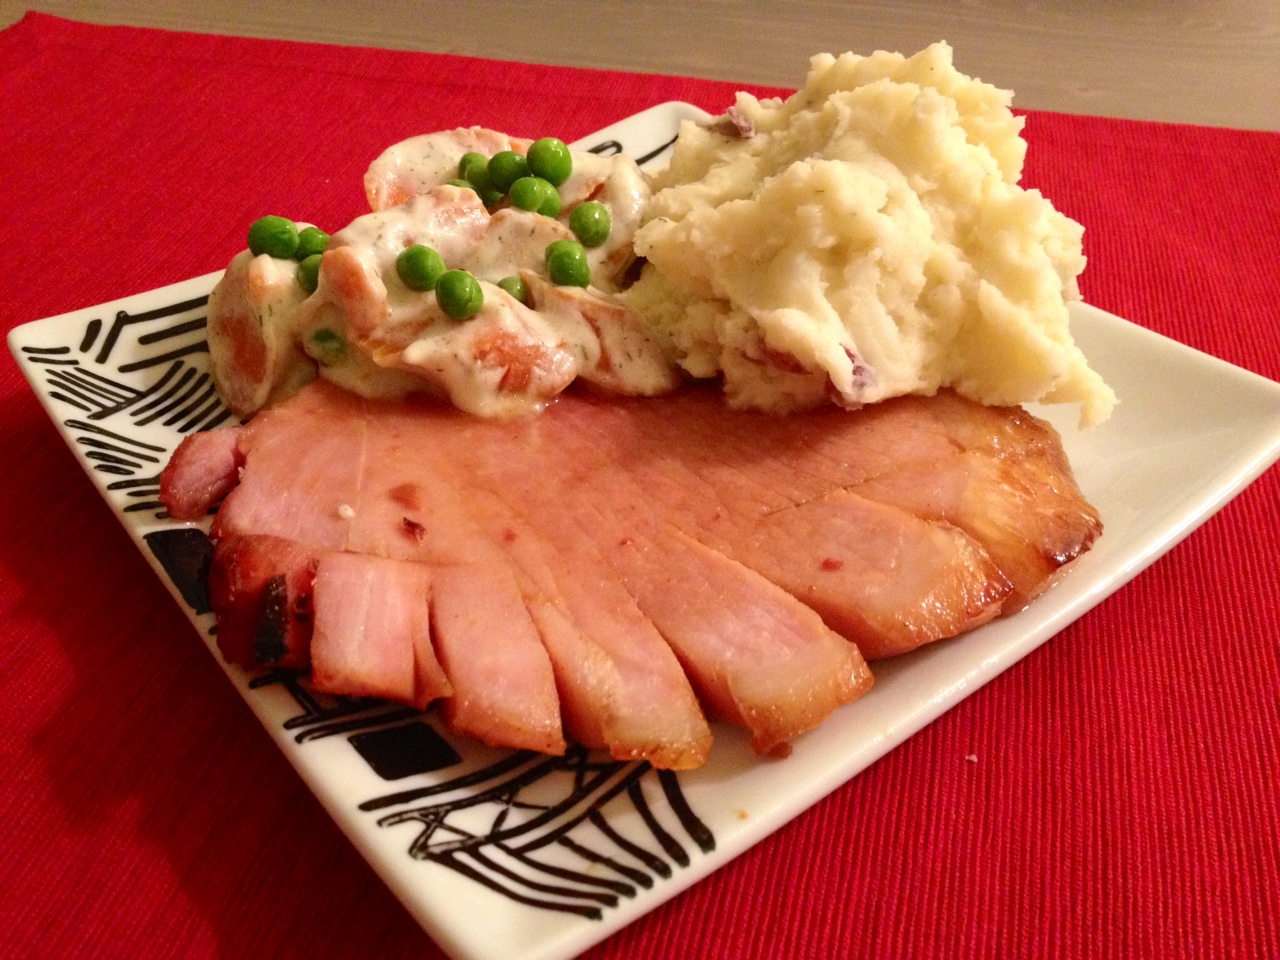
I love a honey-glazed ham over the holidays so when I see hams go on special at my supermarket I’ll scoop one up and do a mini-holiday in between Easter and Thanksgiving. Why wait? I don’t go too crazy–honey-glazed ham, mashed potatoes, and a veggie and  scrumptious Sunday dinner is served. While a pre-glazed and pre-sliced ham is nice and easy, buying a whole ham saves a lot (I paid just $10 for a 7-lb ham) and means you can stud it with cloves and make your own simple and tasty glaze. The most time-consuming part of this ham recipe is definitely studding of the cloves so if you have little ones around then this is the perfect job for them.

Helpful Tip: Whole cloves can be pricey if you look for them in the regular spices section. Check out your Hispanic or International foods section in your grocery store and you should see they are much cheaper ($2 vs. $5)!

whole finished ham

Honey-Glazed Ham

Ingredients:

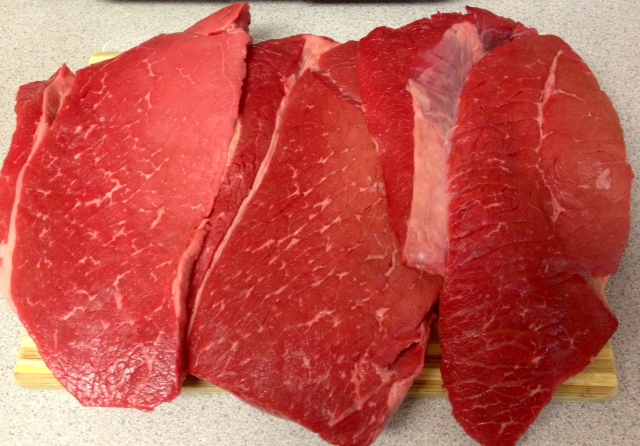
  • 1 whole, fully-cooked ham (Keep in mind that ham will cook 17 minutes per pound)
  • 1/3 cup whole cloves

Honey Glaze:

  • 2/3 cup butter
  • 1 cup honey
  • 1 cup brown sugar
  • 1/4 cup lime juice
  • 1/4 teaspoon cinnamon

Preheat oven to 325°F.

Preparing the glaze:

In a medium saucepan, melt the butter and add the remaining ingredients.

glaze

Bring to a boil and then reduce to a simmer while you prepare the ham.

Preparing the ham:

With a pairing knife, deeply score your ham with long criss-crossing stripes, at least an inch deep.

scored ham

Where the points meet, stud with a whole clove, until the entire ham is covered with cloves.

cloved ham

Remove glaze from heat and glaze ham liberally, reserving some to continue glazing while ham is cooking.

glazed ham

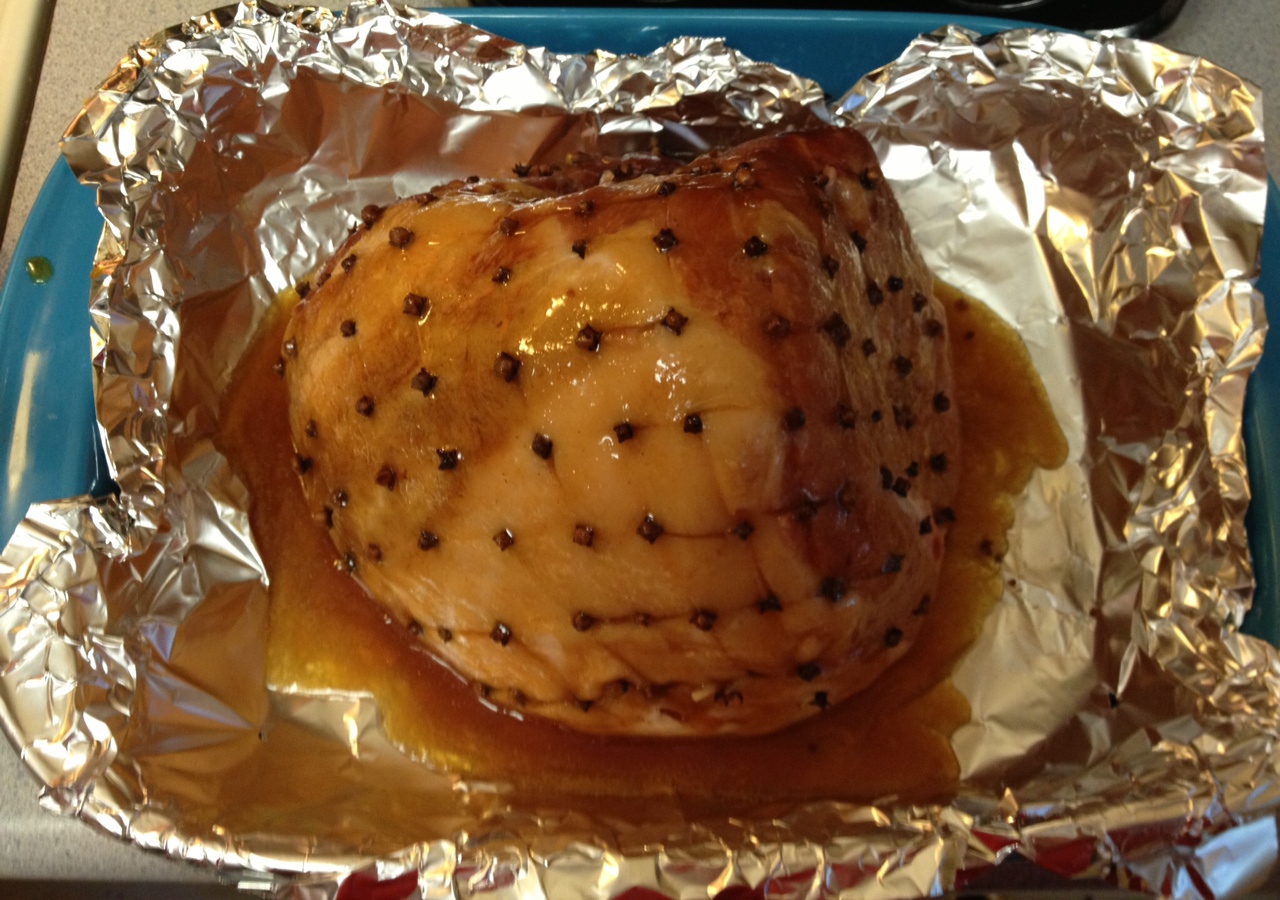
Bake in oven 17 minutes per pound, glazing every 25 minutes or so. Prior to removing the ham, turn on the broiler and broil for 3-5 minutes (keeping a very close eye!) to let the ham and glaze get nice and crispy.

whole finished ham

Remove ham from oven and rest about 10 minutes prior to serving.

Plated ham


Baby Blueberry Key Lime Pies

I came up with this recipe when I couldn’t decide between making a blueberry pie and a key lime pie. I tend to be more partial to blueberry but my boyfriend is smitten by all things key lime. So I resolved that inner conflict by inventing one that marries the two favorites. The result was amazing and I was delighted by the beautiful color (purple is my favorite!).

This recipe is about the easiest and quickest dessert recipes in my inventory but it looks and tastes a lot more involved. I love sneaky recipes like this one! 🙂

While you can certainly use this recipe to fill a large pie shell, there’s really fun about presenting each of your guests with their own baby pie. This is also a great recipe for baby showers or other parties; it’s a cinch to double and they hold up really well.

Baby Blueberry Key Lime Pies

Baby Blueberry Key Lime Pies
Makes 12 baby pies or 1 large pie

Ingredients

  • 1 pint fresh blueberries
  • 1 cup key lime juice
  • 1 tablespoon grated lime zest
  • 2 (14 ounce) cans sweetened condensed milk
  • 1/2 cup sour cream
  • 12 miniature graham cracker crusts

Preheat oven to 350°F.

In a small pan over medium high heat, combine blueberries and lime juice and bring to a boil. Reduce and simmer for 2-3 minutes until the blueberries start to soften.

Blueberry & Lime Juice

Remove from heat and cool in the refrigerator.

In a medium bowl, mix together the lime zest, sweetened condensed milk, and sour cream.

milk and lime

Add the cooled blueberry mixture and mix until smooth. Check out that gorgeous color!

blueberry lime mixture

Pour the mixture into the prepared graham cracker crust. Be sure to fill as closely to the top as possible. They will settle down a bit during baking.

Filled pies

Bake baby pies in preheated oven for 15 minutes. Remove from oven and let cool. Be sure to chill in the refrigerator before you serve as they taste best chilled. Garnish with lime slices and/or whipped cream and serve.

Plated Pies

Brazilian Steak with Cilantro Lime Sauce

I’ve been craving red meat recently. Not super surprising since I don’t eat it very often. We tend to eat a lot of chicken and fish so when a red meat meat craving hits, it can hit pretty hard. I was really in the mood for a Brazilian Steakhouse so I challenged myself to recreate it at home! I made a super simple 2-in-1 marinade and sauce for the meat, invited a few friends over, and had a proper grill-out, Brazilian style! The steak was incredibly flavorful and fully satisfied my craving! I hope you’ll try this recipe because it really knocks it out of the park!

Title Photo

Brazilian Steak with Cilantro Sauce
Serves 8

Ingredients:

  • 3 cups fresh cilantro
  • 6 garlic cloves
  • 1 tablespoon kosher salt
  • 1 teaspoon ground pepper
  • 1/4 cup sugar
  • 1 cup olive oil
  • 1 cup red wine vinegar
  • 1/2 cup water
  • 4 limes, juiced and zested
  • 5 lbs. London Broil Steak
    • I used London Broil but you can use also use flat iron, top sirloin, or really any cut of meat you like to grill.

Directions:

Marinade/sauce:
In a blender, add cilantro, garlic cloves, kosher salt, pepper, sugar, olive oil, red wine vinegar, water, lime juice and zest.

image

Blitz until smooth. Reserve 2 cups to use as a marinade for the steaks and pour the rest of the sauce into a storage container and refrigerate until ready to serve.

Cilantro Marinade & Sauce

Preparing the steaks:

Raw Steaks

Using a meat tenderizer, give both sides of the steaks several good whacks with the side that has teeth (see photo below of my meat tenderizer). This part is quite fun, I assure you! 🙂

Tenderizing Meat

Place meat in a large casserole dish or large storage container. Pour 2 cups of the cilantro marinade over the steaks, making sure both sides are well coated. Seal container with lid or cover with plastic wrap and marinate in the refrigerator for 4 hours minimum. 6-12 hours is ideal since this marinade will work some serious magic on even the toughest cuts of meat!

Grilling Time!

After the meat is done marinating, it’s time to grill! Aim for a medium-high heat and then throw the steaks on when nice and hot. I love a medium rare steak so it took about 20 minutes (10 minutes per side) to achieve that.

Grilling Steaks

Cooking time will vary depending on the grill, steak cut, thickness, and desired internal temperature so keep that in mind and be sure to keep a close eye. This is where having a grill-safe meat thermometer comes in super handy!

Once you’ve removed the meat from the grill, slice at an angle in thin strips. Be sure to slice with the grain since slicing against the grain will results in chewy meat. Pile the sliced meat on a plate and serve alongside the remaining cilantro sauce. I put the sauce in a big bowl and just let my guests drizzle as much or as little as they liked.

Plated Steak

This dish was a huge hit and the steak was gobbled up in no time! I’ll definitely be making it again but will plan on leftovers next time as the meat would be great the next morning transformed into steak and eggs and for lunch as a nice steak salad or wrapped up in warm tortillas as fajitas. I did have cilantro sauce left over though, so my plan is to transform some boring tilapia later in the week into something a little more festive. I love recipes that keep on giving and this one really knows how to do exactly that!

Rosa de Jamaica Hibiscus Tea

While visiting my boyfriend’s family in Guatemala last Christmas, I fell in love with the most amazing drink, Rosa de Jamaica, or Hibiscus Flower Tea. In Spanish, it means the Rose of Jamaica. The drink it produces is tangy, fruity, and sweet, all wrapped up in a vibrant berry red color. It took only one sip to convert me to its magical powers and I was absolutely shocked to hear it was a tea made from flowers and not a local Kool-Aid of sorts.

Image

Turns out the hibiscus flower actually has many medicinal properties to it and is loaded with Vitamin C. Consuming hibiscus helps:

  • Digestion
  • Lower Blood Pressure
  • Coughs
  • Reduces the absorption of UV radiation in the skin
  • Slows hair loss
  • Slows hair turning gray

See, it is magic!

So delicious and definitely a drink I wanted to make back home. After consulting a few family members, I had the recipe in hand. I made a pitcher of it yesterday and it was like being teleported right back to Antiqua. So here’s the recipe:

Rosa de Jamaica

  • 1 cup hibiscus flowers* These can be found at most Latin or Asian supermarkets, tea shops, or you can buy them online. Below is what the loose flowers look like:
    Image
  • 16 cups of boiling water
  • 1 1/2 cups sugar
  • 2 limes, quartered
  • 1/4 teaspoon ground ginger
  • 1/2 teaspoon ground cinnamon
  • 1/4 teaspoon ground cloves

Directions:

1. Place hibiscus flowers, sugar, and spices in the bottom of a pitcher and add boiling water.

2. Squeeze in the lime juice and stir until well incorporated.Image

3. Let steep for 20 minutes.

4. Strain out the flowers and limes and chill.

Enjoy!

Image

I hope you’ll try this recipe! It’s also a fabulous mixer for cocktails. 🙂

Glorious Garlic & Lime Rotisserie Chicken

Rotisserie chicken is truly the most glorious thing. EVER. To follow up my earlier post about purchasing my rotisserie machine, I am proud to say that I made my first rotisserie chicken and it came about beautifully! Image

You could certainly replicate it by roasting but I’m completely sold on my rotisserie machine so if you have one, USE IT! It’s so much easier than roasting a chicken and the flavor is all the proof you need. Here’s the recipe:


Garlic & Lime Rotisserie Chicken

  • 1 Whole Chicken*. I used a 5 lb. chicken. No matter the size, you’ll want to plan on 15 minutes per pound and also note that you’re looking for an internal temp of 170-180°F.
  • 1/2 cup of butter, softened
  • 2 T. of minced garlic
  • 3 limes, zested and juiced
  • Ground Pepper
  • Kosher salt

If your chicken comes with a pack of innards, remove and throw out. Wash and dry the chicken and season the cavity liberally with salt and pepper and set aside.

In a small bowl, combine softened butter with minced garlic, 1 tsp. ground pepper, 2 tsp. kosher salt, and zest and juice of the three limes. Work the garlic butter mixture under the skin of the chicken. spread around liberally. Reserve about a tablespoon to spread on top of the skin.

Using elastic food ties or butcher’s twine, truss the chicken. If you don’t have elastic food ties and want a super quick and easy way to truss the chicken with butcher’s twine, click HERE.

Place chicken on the spit rods and set time for 75 minutes or until the internal temperature is 170-180°F. When the timer goes off, let the chicken rest for 10 minutes in the rotisserie instead of on the counter by having it spin without heat. After it’s rested, remove and serve.

***Roasting Method*** For those roasting in the oven, bake at 425°F for 1 1/2 hours or juices run clear. Internal temp should 170-180°F.

Random side note: If you are looking for an inexpensive digital food thermometer, this is the one I own and LOVE.

My Infomercial Addiction

Let it be known…I have a serious infomercial addiction. But it’s really not that bad (spoken like a true addict)! I enjoy watching the infomercials but rarely do I actually buy the product advertised. Until now! First a little back story…Since I was little, my all-time favorite infomercial was for the Ronco rotisserie. You know the one; SET IT AND FORGET IT! As a little girl, I dreamed of all the amazing things I could make in that silly rotisserie. Well, needless to say I never bought it (I was maybe 11 at the time) and pretty much forgot all about those days of lusting after rotisserie chicken and screaming along with the audience as Ron turned the dial.

After a recent trip to Guatemala to visit my boyfriend’s family, his Dad made us the most amazing pork loin I’ve ever had in his Ronco rotisserie that’s he’s had for maybe 15 years. It was absolutely amazing and took me back to the days of SET IT AND FORGET IT!

So we get back from our trip and for the past few months I’ve been talking about that stupid pork loin and all the other great things that we could make in one of these machines. My poor boyfriend has probably started to go batty from listening to me prattle on about it. Since it’s $130 it wasn’t an easy decision since the last thing I wanted was to buy the machine and have it die the oh to frequent infomercial death we all hear about and occasionally participate in. Alas, my birthday rolled around and I scored some serious Amazon gift card moolah and bought one for my very own! UPS just delivered it so I’m ready to get started! Here’s the white one I bought: 

It was a toss-up between white and stainless steel:But I think the white goes best with my kitchen. I promise you this; I shall prevail and come out on the other side pudgier but happy that I’ve used the crap out of my Ronco.