Tag Archive | kid-friendly

Pucker Up Buttercup-cakes

two cupcakes
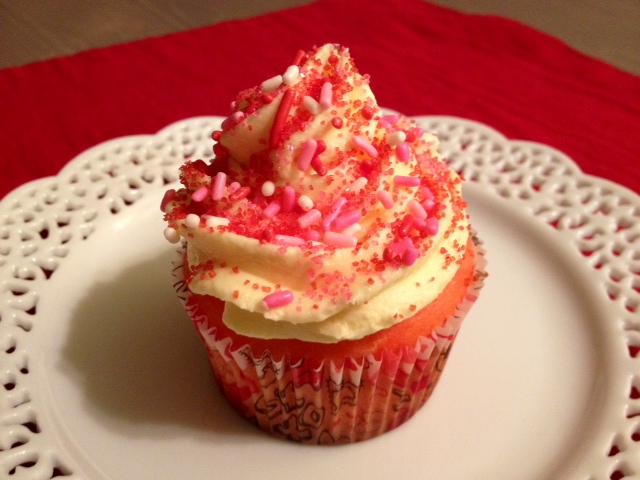
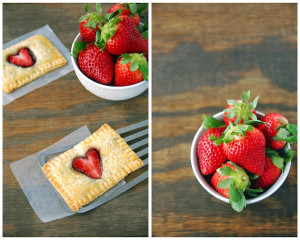
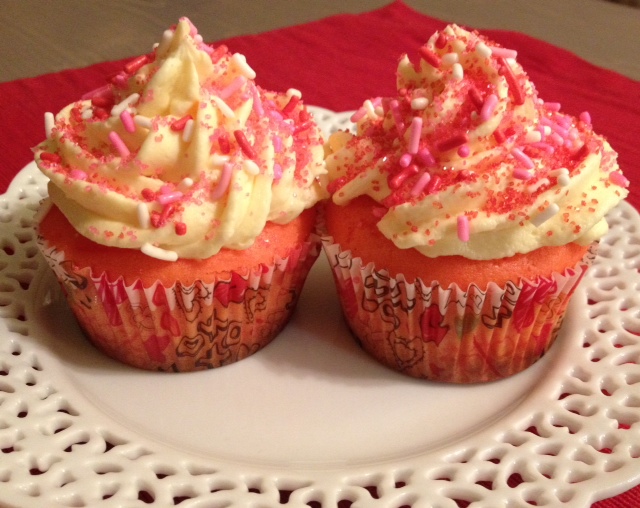
Love is in the air…or is that just the smell of cupcakes in the oven? Either way, these cupcakes will have you channeling St. Valentine in no time. A classic vanilla cupcake combined with the tartness of pink lemonade is just the incentive needed to pucker up and smooch somebody. This lemony tart concoction is perfectly complimented by a sweet butter cream frosting and packs a deliciously sweet and sour punch. Oh and they’re super easy! They’re perfect for a Valentine’s party or for making for your sweetheart.

Pucker Up Buttercup-cakes
Makes 24 cupcakes

Ingredients: 

Cupcakes

  • 1 box of vanilla cake mix
  • 3 Tablespoons powdered pink lemonade mix
  • 3 eggs
  • 1/2 cup oil
  • 1/4 cup water
  • red or pink food coloring

Frosting

  • 1/2 cup (1 stick) butter, softened
  • 1/2 cup shortening
  • 4-5 cups powdered sugar
  • 1/8 teaspoon salt
  • 1/4 cup milk
  • yellow food coloring
  • sprinkles and edible Valentine’s decorations, optional

Directions: 

1.  Preheat oven to 350°F. Line your cupcake pans with paper baking cups.

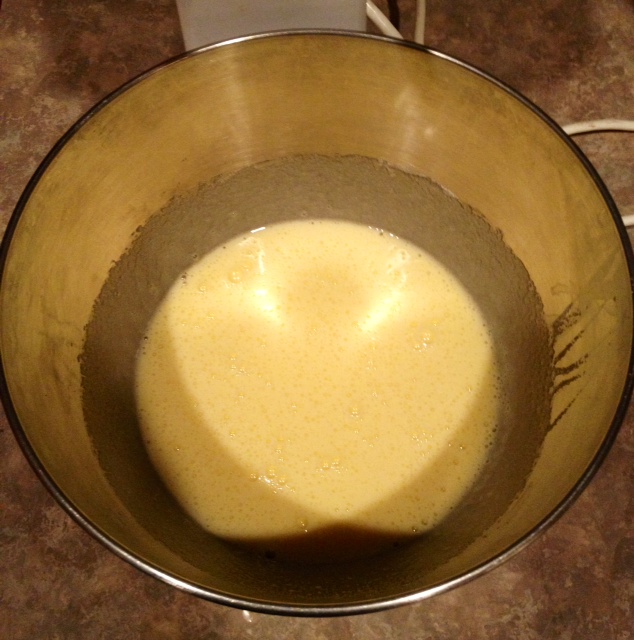
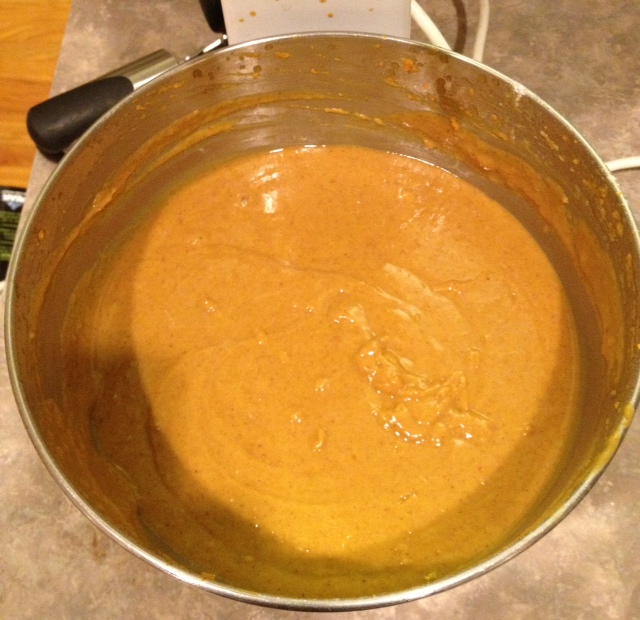
2. In a large bowl, combine cake mix, pink lemonade mix, eggs, oil, and water and beat for several minutes, until combined. Add a few drops of food coloring, until batter is the desired shade of pink.

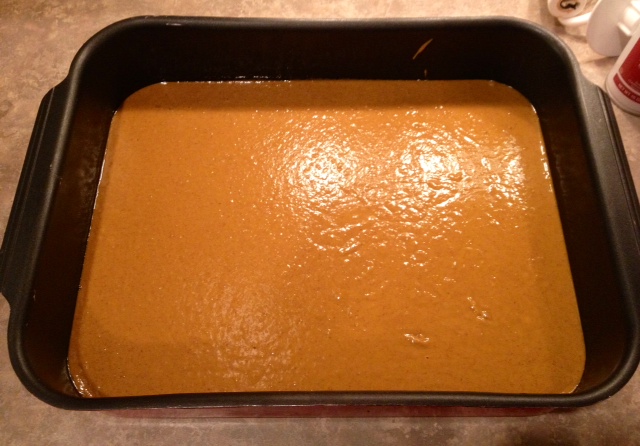
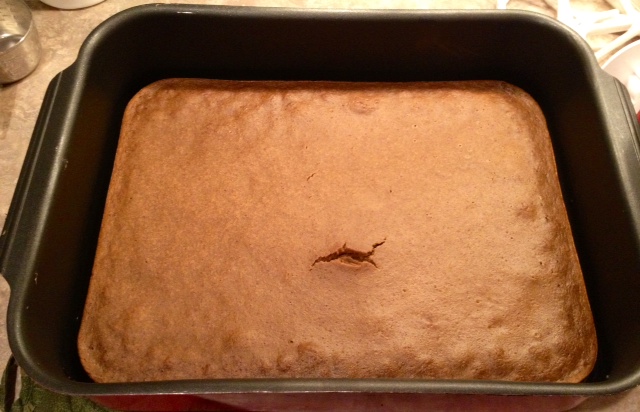
3. Scoop batter into lined cupcake pans and bake for 15-20 minutes. Cool completely before frosting.

4. Frosting: In a large bowl, cream together the butter and shortening. Gradually add in the cups of powdered sugar and salt. Beat in the milk and add more powdered sugar if necessary. Add a few drops of yellow food coloring until it’s your desired shade of yellow.

5. Frost the cooled cupcakes with a piping bag or with a spatula. Decorate with optional sprinkles and edible Valentine’s decorations.

It’s time to pucker up! Have a Happy Valentine’s Day!

Plated Cupcakes

Top Pinterest Recipe Pins of 2013

#1 30 Yummy Weight Watcher Dinner Recipes

17,270 pins
30WWrecipes

#2 Philly Cheesesteak Stuffed Peppers
15,895 pins
phillycheesepeppers

#3 Hash Brown Cups
15,851 pins
hashbrown cups

#4 Spinach Artichoke Chicken
14,947 pins
spinachartichokechicken

#5 Double Decker Taco Cupcakes
14,304 pins
TacoCupcakes

#6 Buffalo Chicken Meatballs
13,153 pins
buffalo meatballs

#7 Red Velvet Poke Cake
12,625 pins
redvelvetpokecake

#8 Reese’s Peanut Butter Crispy Treats
12,261 pins
reeses

#9 Nutella Brownies
11,089 pins
nutellabrownies

#10 Meatball Bubble Biscuits
10,301 Pins
meatballbiscuits

#11 Beer Cheese Dip
10,172 pins
beercheese

#12 Rosemary Chicken Lasagna
9,935 pins
chickenlasagna

#13 Churro Waffles
9,426 pins
Churrowaffles

#14 Skinny Strawberry Chocolate Chip Muffins
9,078 pins
strawberry muffins

#15 Beer-Candied Bacon
8,481 pins
Beerbacon

#16 Vegetable Tian
8,071 pins
veggie

#17 Cinnamon Toast the Pioneer Woman Way
7,833 pins
Cinnamon toast

#18 Cheesy Baked Spaghetti Squash Boats with Grilled Chicken
7,361 pins
spaghettisquash

#19 Strawberry Nutella Poptarts
4,072 pins
strawberry poptarts

#20 Two-Ingredient Banana Peanut Butter Ice Cream
3,577 pins
peanutbuttericecream

Nutella Thumbprint Cookies

image_4Anything is better with Nutella, right? Well that’s certainly the case with these little tasties. A rich buttery cookie is taken straight to heaven when rolled in coconut and a lovely gem of nutella placed in the center. It’s actually a really easy cookie to whip up and oh so yummy. A great cookie recipe for holiday baking or cookie exchanges and it will quickly become a family favorite. Yummy to the max!

Nutella Thumbprint Cookies
Yields 36 cookies

  • 3 sticks (3/4 pound) butter, softened
  • 1 cup sugar
  • 1 teaspoon vanilla
  • 3 1/2 cups flour
  • 1/2 teaspoon salt
  • 1 egg beaten with 1 tablespoon water, for egg wash
  • 7 ounces sweetened flaked coconut
  • Nutella (the amount depends on how generous you are but you’ll need approximately 1/2 cup)

Directions: 

1. In a mixer, cream together the butter sugar for several minutes.

image

Add the vanilla and gradually add the flour and salt until well combined.

image_2

2. Transfer the dough onto a piece seran wrap, form into a large ball, and refrigerate for 30 minutes to chill. If you’re in a hurry you can also pop it in the freezer for 5-10 minutes.

Dough in seran wrap

3. Preheat oven to 350°. Form the chilled dough into balls, approximately 1 1/4 inches, or weighing 1 ounce if you’re using a scale.

Rolled dough into balls

Dip the balls into the egg wash, roll in flaked coconut, and transfer to an ungreased cookie sheet. Use your finger or thumb to form an indentation in the dough for filling with Nutella. 🙂

rolled balls in coconut

Using a teaspoon, fill each indentation with about 1/4 teaspoon of Nutella.

filled with nutella

4. Bake for approximately 20-25 minutes or until the edges are a light brown and the coconut is toasted. Since all ovens vary slightly, I always recommend baking one cookie first to see what the exact time is to avoid burning an entire sheet.

baked nutella cookies

5. Transfer cookies to a wire cooling rack. Eat the cooled Nutelal Thumbprint Cookies with a glass of milk or hot cocoa. Enjoy!

Plated Cookies

Cranberry Tangerine Cookies

Plated cookiesA very fond memory I have of growing up in Germany is of baking cookies during the holidays. A popular German tradition is holiday cookie baking, where families will spend several days or even weeks preparing for the holidays by baking dozens and dozens of cookies and lining them in prepared holiday tins. When visiting friends and family you bring a box of cookies as a present and often receive one back. German cookies tend to be less sweet than a typical American cookie and often filled with fruit and nuts. This recipe for Cranberry Tangerine Cookies is inspired by the German cookies you could expect in your tin. Filled with cranberries, almonds, and tangerine, they’re the perfect bit of sweet treat you want.

Cranberry Tangerine Cookies
Yields 4 dozen cookies

Ingredients:

  • 1 cup butter, softened
  • 1 cup white sugar
  • 1/2 cup packed brown sugar
  • 1 egg
  • 1 teaspoon grated tangerine zest
  • 2 tablespoons tangerine juice
  • 1/4 teaspoon almond extract
  • 3 cups flour
  • 1/2 teaspoon baking soda
  • 1/2 teaspoon salt
  • 2 cups fresh cranberries, roughly chopped
  • 1/2 cup toasted almonds, chopped (you can also use walnuts or pecans if you prefer)

Icing

  • 1/2 teaspoon grated orange zest
  • 3 tablespoons tangerine juice
  • 1 1/2 cups confectioners’ sugar

 Directions: 

1. Preheat oven to 375°. In a large bowl, cream together butter and the brown and white sugar for several minutes.

sugar and butter creamed together

Add the egg, tangerine zest and juice, almond extract, and mix well. Gradually add the flour, baking soda, and salt until well incorporated.

dough with flour

Stir in the cranberries and almonds.

dough with pecans and cranberries

2. Using a cookie scoop or tablespoon, scoop rounded tablespoons of cookie dough on ungreased cookie sheets and bake for 12-14 minutes. Since every oven varies slightly, I always recommend you bake one cookie all by itself to see exactly how long you need. Better to accidentally ruin one cookie than an entire tray!

dough on cookie sheet


baked cookies

3. Transfer from cookie sheet to a cooling rack.

4. While cookies are cooling, mix together the ingredients for the icing.

ingredients for glaze

Using a fork or a whisk, drizzle icing over the cookies.

Iced cookies

Allow icing to set before transferring to cookie tins or eating. Enjoy!

Plated cookies

Halloween Crack

Halloween Crack platedFall is truly my favorite time of the year. With Halloween and Thanksgiving just around the corner, sweaters are pulled out of closets, apples are plucked from trees, pumpkins displayed on the front stoop, and I’m whipping up batches of Halloween Crack. Wait, what?!?! Yep, you heard me right. Okay, it’s actually a delicious party mix made of pretzels, M&M’s, peanuts, and other ingredients, all tossed in a homemade toffee concoction but it’s so decadent and addictive that it’s now better known as Halloween Crack. You’ll understand when you grab your first handful. Just trust me. This recipe was given to me by one of my Mom’s friends who used to make it for parties and it was a guarantee that anyone who tasted it had to have the recipe. This is one of those fall recipes that can’t be beat and should definitely make an appearance at your next Halloween or fall party!

Halloween Crack
Yields 16 cups

Important Note: You can swap out and adjust the ingredients to suit your taste. For example, instead of peanut butter sandwiches try using mini Oreos, instead of plain M&M’s try peanut or almond. There are lots of fun and yummy options!

  • 1 package miniature pretzels or pretzel sticks (11 oz)
  • 1 package miniature peanut butter sandwiches (8 oz)
  • 1 cup dry roasted peanuts
  • 1 cup sugar
  • ½ cup butter
  • ½ cup light corn syrup
  • 2 Tablespoons Vanilla
  • 1 teaspoon baking soda
  • 1 package plain M&M (10 oz)
  • 1 package candy corn (15 oz)

Directions: 

1. In a large bowl, mix pretzels, crackers, and peanuts. Set aside. Preheat oven to 250°.

2. Using a dutch oven or a large pot with high sides, combine sugar, butter, and corn syrup. Bring to a boil over medium heat and boil for 5 minutes, stirring regularly.

butter, corn syrup, sugar.

Remove from heat, stir in vanilla and baking soda. Note: The mixture will foam up, hence using a pan with high sides to prevent bubbling over. 

butter, corn syrup, sugar with vanilla and baking soda

3. Pour hot mixture over the pretzels, crackers and peanuts and gently stir until coated.


Toffee over pretzels


Pour onto a large greased jellyroll or roasting pan.

Pretzel mixture in baking pan

4. Bake for 40 minutes, stirring every 12 minutes. Remove from oven and, while still warm, break apart any big chunks of the mixture. Toss with M&M’s & candy corn.

Added M&M's and candy corn

Allow mixture to cool completely before serving or store in an air tight container to enjoy later.

Finished mixture in a bowl

Cream Cheese Pumpkin Bars

Plated Pumpkin BarsAs soon as the air starts to get crisp and the leaves start to turn, I start dreaming of my favorite fall recipes; hearty soups and stews, apple cider, and wedges of these gloriously amazing pumpkin bars. What makes these bars extra special is that they a cross between a pumpkin cake and a pumpkin pie. These pumpkin bars are so good that they were once heroically saved during a fire that accidentally ignited while I was camping in Yellowstone National Park with friends. Everyone was scrambling to put out the fire but several of the guys screamed for us to save the pumpkin bars, something we still laugh about to this day. As the guys put it afterward, “Thankfully, no pumpkin bars were harmed in the fire.” I hope you enjoy these as much as my family does.

Cream Cheese Pumpkin Bars

  • 2 cups sugar
  • 4 eggs
  • 1 cup cinnamon applesauce
  • 2 (15 ounce) cans pumpkin
  • 1 teaspoon vanilla
  • 2 cups flour
  • 2 teaspoons baking powder
  • 1 teaspoon baking soda
  • 1 Tablespoon cinnamon
  • 1 teaspoon nutmeg
  • 1 teaspoon pumpkin pie spice
  • 1/2 teaspoon ground cloves
  • 1 teaspoon salt

Frosting:

  • 8 oz. reduced fat cream cheese, softened
  • 1 stick butter, softened
  • 1 teaspoon vanilla
  • 1 teaspoon lemon juice
  • 3 cups powdered sugar

Instructions:

1. Preheat oven to 350°.

2. Beat the eggs and sugar together for several minutes until nicely whipped and creamy.

creamed egg and sugar

Add the applesauce, pumpkin, and vanilla and beat until well incorporated.

Added pumpkin

Gradually add the flour and the rest of the dry ingredients until well blended.

finished mixture

3. Pour batter into a greased jelly roll or sheet pan (15×10″).

Batter in pan

Bake for 20-25 minutes or until a fork comes out clean. If you don’t have a jelly roll or sheet pan or you prefer thicker bars, you can also bake in a 9×13″ for 25-30 minutes.

Pumpkin bars baked

***Allow bars to cool completely before frosting.***

4. Frosting: Whip together the cream cheese and butter. Add the vanilla and lemon juice. Gradually whip in the powdered sugar and beat until the mixture is a thick frosting.

Combined frosting

5. Frost the cooled bars and serve immediately. Enjoy!

Plated Pumpkin Bars

Easy Oven-Baked BBQ Chicken

BBQ Chicken

There’s nothing quite like some finger-lickin’ BBQ chicken for dinner. The only problem is when you don’t want to worry about firing up the grill. No worries! This recipe packs all the flavor punches of a traditional grilled BBQ chicken into a simple baked version. We’re talking 40 minutes from start to finish! The secret is cranking up the heat at the beginning to get that crispy skin, then smothering in your favorite sauce and dropping the heat. I love how quick and easy it is—perfect for a weekday meal. It’s also one super economical family meal since you can use inexpensive leg quarters, drumsticks, or a whole chicken cut into pieces.

Easy Oven-Baked BBQ Chicken
Servings are for one whole chicken, cut into pieces but you can easily adjust portions.

  • 4 pounds chicken pieces, with skin on
  • 2 teaspoons garlic powder
  • 2 teaspoons salt
  • 1 teaspoon paprika
  • 1 teaspoon pepper
  • 1 bottle of good BBQ sauce

Directions:

1. Preheat oven to 450°F. Line a baking dish with aluminum foil and place a baking rack over it. Make sure the dish has a lip on it to catch the chicken drippings! Spray rack with cooking spray.

Baking rack on foil-lined pan

2. Clean chicken pieces and pat dry with paper towels. Arrange chicken pieces on the rack. Sprinkle with garlic powder, salt, pepper, and paprika.

Seasoned raw chicken

3. Bake chicken for 35 minutes or until skin is crispy and internal temperature is 165°F. Remove chicken from oven and reduce oven temperature to 350°F.

Baked chicken without sauce


4. Baste chicken with barbecue sauce and bake for 5 additional minutes.

Sauced chicken


5. Remove from oven and baste with more sauce. Allow chicken to cool sufficiently and dig in!

BBQ Chicken


5-Minute Rocky Road Fudge

fudge pieceI’ll be honest, I’m not a huge fan of fudge. I find that it’s often either way too rich or way too sweet. All that changed when a friend introduced me to this amazing fudge a few years ago. She was whipping up several batches to mail off to friends and family at Christmas and I happened to stop by at just the right moment. I lent a hand with the fudge factory and was rewarded with a plate to take home. I remember taking that first tentative, teeniest of bites and then proceeded to shove the whole piece into my gob as fast I could get it in there. This isn’t fudge. It’s crack. Holiday crack. It’s smooth rich chocolate is studded with nuts and marshmallows which go together so well that even the pickiest of fudge-eaters are happily brought over to its dark side. Now I’m the one who includes this delicious fudge in my Christmas cookie tins. Just be sure to always set aside a few squares for yourself or pop in the freezer for a rainy day. Did I mention how easy this fudge recipe is? All done in the microwave and prep time is 5 minutes or less!

This recipe was adapted from a NESTLÉ TOLL HOUSE recipe.

Rocky Road Fudge

Ingredients: 

  • 2 cups semi-sweet chocolate chips
  • 1 can (14 oz.) sweetened condensed milk
  • 2 teaspoons vanilla extract
  • 3 cups miniature marshmallows
  • 1 1/2 cups coarsely chopped walnuts or peanuts

Directions: 

1. Line a 9″ square baking pan with foil and spray with non-stick cooking spray.

image_2

2. In a medium microwave-safe bowl, combine chocolate chips and sweetened condensed milk.

Chips and sweetened condensed milk

3. Microwave for 1 minute and stir. Since microwaves vary, it might be necessary to microwave for 10-15 seconds then stir and repeat as necessary until it’s nice and smooth.

Creamy chocolate

4. Stir in vanilla then fold in marshmallows and nuts.

Marshmallows and nuts stirred in


5. Spread mixture into greased pan and press flat with spatula.

Smoothed mixture into pan


6. Refrigerate for at least 2 hours or until the mixture has hardened. QUICK NOTE: If you’re in a hurry you can also pop the pan in the freezer to help speed it up.

Hardened fudge

7. Lift foil from pan and use a pizza cutter to cut into small squares. Enjoy!

squares


Dark Chocolate Cherry Oatmeal Cookies

If you like chewy oatmeal cookies then you’ll love this recipe which incorporates dark chocolate chips, dried cherries, and walnuts. The flavors work really well together and make for a very tasty cookie!

Plated Cookies

Dark Chocolate Cherry Oatmeal Cookies
Makes 2 dozen cookies

Ingredients:

  • 1/2 cup butter, softened
  • 1/4 cup white sugar
  • 1/2 cup packed dark brown sugar
  • 1 eggs
  • 2 teaspoons vanilla extract
  • 2/3 cup all-purpose flour
  • 1/2 teaspoon baking soda
  • 1/2 teaspoon salt
  • 1 & 2/3 cups quick-cooking oats
  • 3/4 cup chopped walnuts
  • 1/2 cup dark chocolate chips
  • 1/2 cup dried cherries

Directions:

Preheat oven to 325°F.

In a medium bowl, cream together the sugars and butter.

Sugar and butter

Add egg and vanilla and beat. Whisk in flour, baking soda, and salt and beat until well blended.

Blended Dough

Stir in the oats, walnuts, chocolate chips and cherries.

Finished Dough

Using a cookie scoop or a large spoon, scoop spoonfuls of cookie dough onto a greased cookie sheet.

Cookies on cookie sheet

Bake for 13 minutes or until cookies are chewy in the center and crispy on the edges.

Note: With any cookie recipe, I strongly recommend you bake one cookie all by itself to test out the exact baking time for your oven. It’s a lot better to pitch one burnt cookie than an entire pan. I’ve learned this lesson the hard way!

Plated Cookies

Chicken Verde Enchiladas

Chicken Verde Enchiladas are a super easy recipe that is deliciously creamy, satisfying, and kid-friendly. This is my go-to recipe to whip up when a friend has a baby or I’m asked to bring a main dish for a potluck. It transports easily and freezes and reheats so well. It’s also a great recipe for using up any leftover cooked chicken you have.

Plated Enchiladas


Chicken Verde Enchiladas
Makes 8 enchiladas

Ingredients:

  • 2 tablespoons olive oil
  • 1 small onion, diced
  • 1 cup mushrooms, diced
  • 4 garlic cloves, minced
  • 1 1/2 cups chicken, shredded
  • 3 cups cheddar cheese, divided
  • 1/2 cup sour cream
  • 1 (15.8 ounce) can Great Northern beans
  • 1/2 teaspoon pepper
  • 1 (10.7 ounce) can cream of mushroom soup
  • 1 cup salsa verde (Find in the salsa aisle or Hispanic foods section of your supermarket)
  • 8 flour tortillas, taco size

Directions:

Preheat oven to 350°F.

In a medium-high heat skillet, sauté onions and mushrooms in olive oil for several minutes, until softened. Add minced garlic and cook for 1-2 minutes and remove from heat. Set aside.

Grilled onions, mushrooms, garlic

In a medium bowl mix together shredded chicken, 1 cup of the cheddar cheese, sour cream, beans, and pepper. Add the grilled onion and mushroom mixture and mix together. Set aside.

Filling

In another bowl, mix together cream of mushroom soup and salsa verde until creamy.

Salsa Verde

Spread a cup of the mixture onto the bottom of a 9×13 casserole dish.

Casserole

Liberally fill each tortilla with the chicken mixture.

Filled tortilla

Roll up and place in the bottom of the casserole dish. Continue with remaining tortillas and filling mixture.

Enchiladas without sauce

Pour remaining mushroom soup/salsa verde mixture all over the filled tortillas.

Enchiladas without cheese

Top with remaining 2 cups of cheddar cheese.

Cheese on enchiladas

Bake for 30 minutes or until cheese is bubbly and starts to brown.

Finished enchiladas

Let cool for 10 minutes and serve.

Plated Enchiladas