Lemon Shrimp Linguine

This recipe pushes all the right flavor buttonslemon, garlic, herbs, and buttery shrimp with just a hint of heat. It comes together very quickly and is on the table in no time. This refreshing shrimp pasta is perfect for a date night in or for sharing with guests over a bottle of wine and some crusty garlic bread.

Plated Lemon Shrimp Linguine

Lemon Shrimp Linguine
Serves 2

Ingredients:

  • 9 ounces linguine
  • 2 tablespoons olive oil
  • ½ cup diced onion
  • 4 garlic cloves, minced
  • 4 tablespoons butter
  • 1 pound uncooked medium shrimp, peeled, devained, and rinsed (If you don’t have fresh then frozen is also totally fine. Just be sure it’s thawed before adding.)
  • 1 cup Italian parsley, roughly chopped
  • 3 lemons, zested and juiced
  • 1 teaspoon salt
  • ½ teaspoon pepper
  • ½ teaspoon red pepper flakes
  • 1 cup freshly grated Parmesan cheese

Directions:

Bring a large pot of salted water to a boil. Add the linguine and cook until al dente. Drain pasta, reserving 1 cup of liquid.

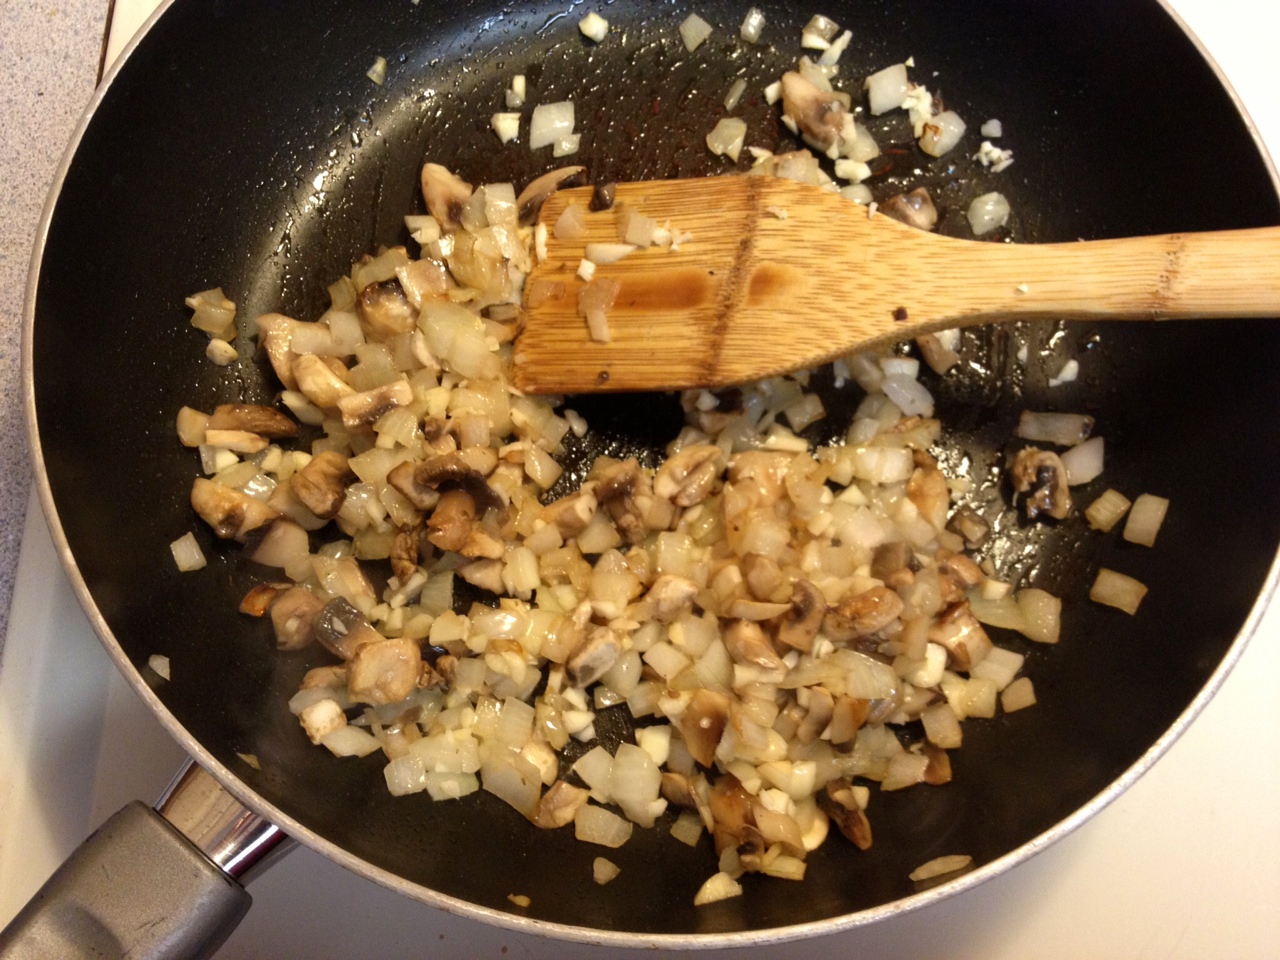
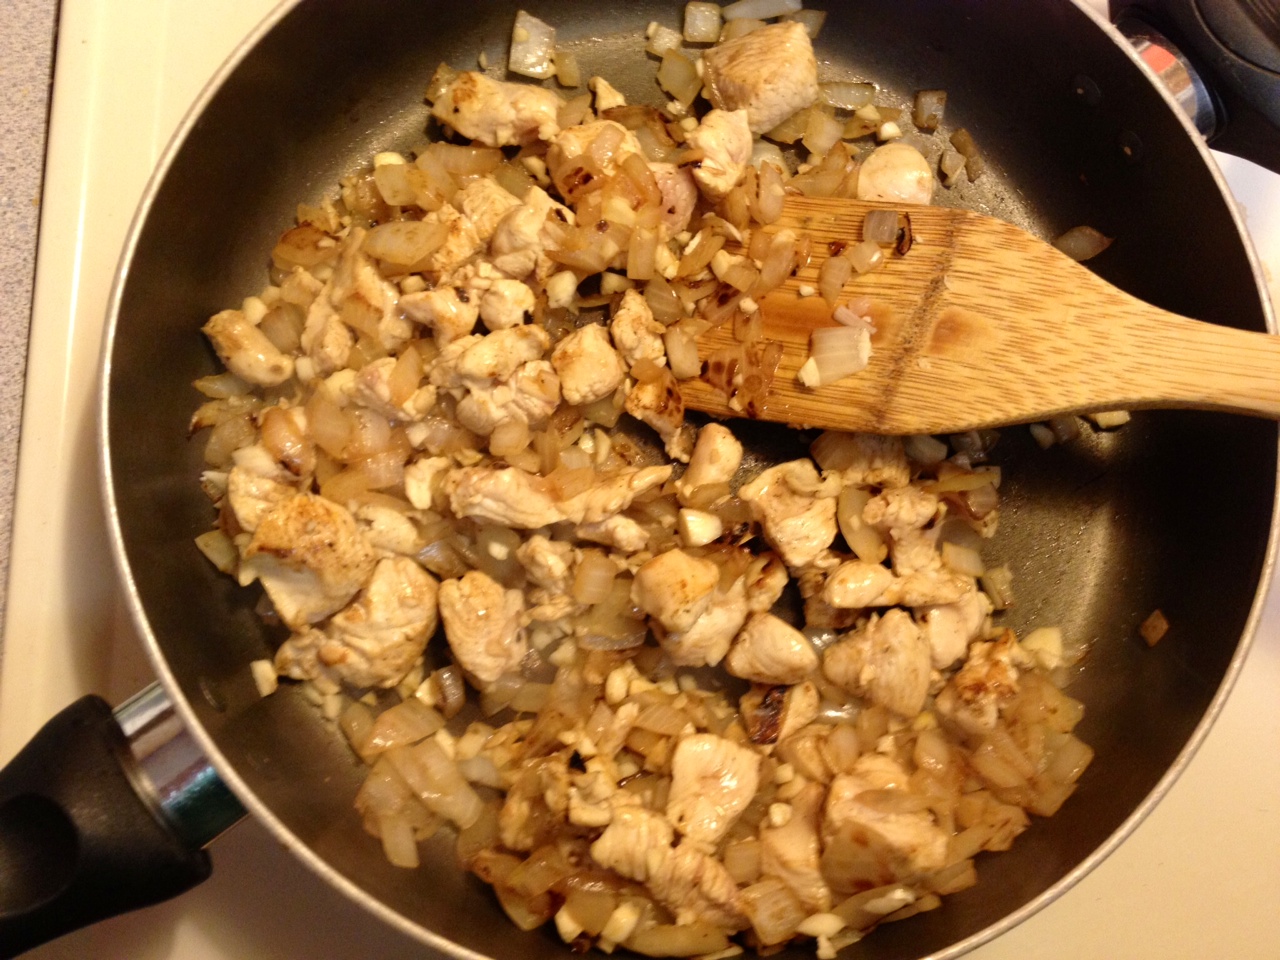
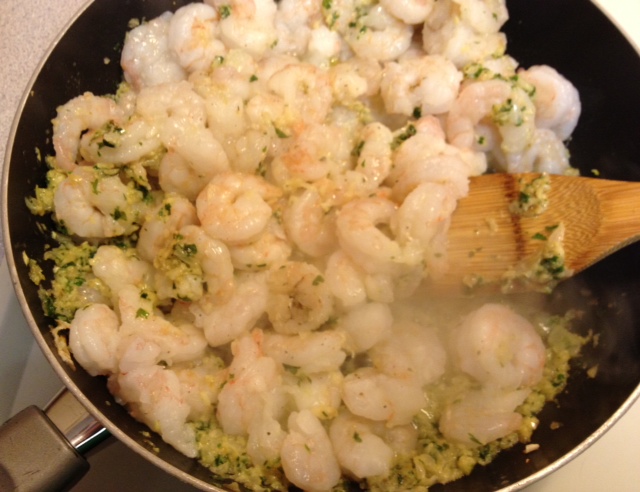
In a skillet over medium-high heat, sauté onion and garlic in olive oil for several minutes, until softened. Add butter and ¾ cups of parsley and heat until  butter is melted.

Garlic, onion, parsley

Add shrimp and sauté for 3-5 minutes or until shrimp is cooked.

Shrimp

Add cooked pasta and pasta water and toss.

Add water

Add lemon juice and zest, salt, pepper, red pepper flakes, and ¾ cups of Parmesan cheese and toss until well incorporated.

Lemon Zest

Lemon Zest and juice

Serve onto two large plates and garnish with remaining parsley and Parmesan.

Plated Lemon Shrimp Linguine

Chicken Verde Enchiladas

Chicken Verde Enchiladas are a super easy recipe that is deliciously creamy, satisfying, and kid-friendly. This is my go-to recipe to whip up when a friend has a baby or I’m asked to bring a main dish for a potluck. It transports easily and freezes and reheats so well. It’s also a great recipe for using up any leftover cooked chicken you have.

Plated Enchiladas


Chicken Verde Enchiladas
Makes 8 enchiladas

Ingredients:

  • 2 tablespoons olive oil
  • 1 small onion, diced
  • 1 cup mushrooms, diced
  • 4 garlic cloves, minced
  • 1 1/2 cups chicken, shredded
  • 3 cups cheddar cheese, divided
  • 1/2 cup sour cream
  • 1 (15.8 ounce) can Great Northern beans
  • 1/2 teaspoon pepper
  • 1 (10.7 ounce) can cream of mushroom soup
  • 1 cup salsa verde (Find in the salsa aisle or Hispanic foods section of your supermarket)
  • 8 flour tortillas, taco size

Directions:

Preheat oven to 350°F.

In a medium-high heat skillet, sauté onions and mushrooms in olive oil for several minutes, until softened. Add minced garlic and cook for 1-2 minutes and remove from heat. Set aside.

Grilled onions, mushrooms, garlic

In a medium bowl mix together shredded chicken, 1 cup of the cheddar cheese, sour cream, beans, and pepper. Add the grilled onion and mushroom mixture and mix together. Set aside.

Filling

In another bowl, mix together cream of mushroom soup and salsa verde until creamy.

Salsa Verde

Spread a cup of the mixture onto the bottom of a 9×13 casserole dish.

Casserole

Liberally fill each tortilla with the chicken mixture.

Filled tortilla

Roll up and place in the bottom of the casserole dish. Continue with remaining tortillas and filling mixture.

Enchiladas without sauce

Pour remaining mushroom soup/salsa verde mixture all over the filled tortillas.

Enchiladas without cheese

Top with remaining 2 cups of cheddar cheese.

Cheese on enchiladas

Bake for 30 minutes or until cheese is bubbly and starts to brown.

Finished enchiladas

Let cool for 10 minutes and serve.

Plated Enchiladas

Honey-Glazed Ham

I love a honey-glazed ham over the holidays so when I see hams go on special at my supermarket I’ll scoop one up and do a mini-holiday in between Easter and Thanksgiving. Why wait? I don’t go too crazy–honey-glazed ham, mashed potatoes, and a veggie and  scrumptious Sunday dinner is served. While a pre-glazed and pre-sliced ham is nice and easy, buying a whole ham saves a lot (I paid just $10 for a 7-lb ham) and means you can stud it with cloves and make your own simple and tasty glaze. The most time-consuming part of this ham recipe is definitely studding of the cloves so if you have little ones around then this is the perfect job for them.

Helpful Tip: Whole cloves can be pricey if you look for them in the regular spices section. Check out your Hispanic or International foods section in your grocery store and you should see they are much cheaper ($2 vs. $5)!

whole finished ham

Honey-Glazed Ham

Ingredients:

  • 1 whole, fully-cooked ham (Keep in mind that ham will cook 17 minutes per pound)
  • 1/3 cup whole cloves

Honey Glaze:

  • 2/3 cup butter
  • 1 cup honey
  • 1 cup brown sugar
  • 1/4 cup lime juice
  • 1/4 teaspoon cinnamon

Preheat oven to 325°F.

Preparing the glaze:

In a medium saucepan, melt the butter and add the remaining ingredients.

glaze

Bring to a boil and then reduce to a simmer while you prepare the ham.

Preparing the ham:

With a pairing knife, deeply score your ham with long criss-crossing stripes, at least an inch deep.

scored ham

Where the points meet, stud with a whole clove, until the entire ham is covered with cloves.

cloved ham

Remove glaze from heat and glaze ham liberally, reserving some to continue glazing while ham is cooking.

glazed ham

Bake in oven 17 minutes per pound, glazing every 25 minutes or so. Prior to removing the ham, turn on the broiler and broil for 3-5 minutes (keeping a very close eye!) to let the ham and glaze get nice and crispy.

whole finished ham

Remove ham from oven and rest about 10 minutes prior to serving.

Plated ham


Cherry White Chocolate Chip Waffles

I love waffles, whether for Saturday breakfast or even dinner during the week. I was sort of at a loss as to what I was craving for dinner so asked Tom to pick. He voted on my waffles, which instantly sounded great. Instead of my plain waffles (which are pretty awesome I have to admit) I decided to add a little pizazz and see what happened. I had some dried cherries and white chocolate chips on hand so decided to throw them in the batter. They turned out great! The cherries add a tartness that contrasts really well with the sweetness of the chocolate chips and syrup. So good and so going at the top of the list for future waffle nights.

Plated waflfes

Cherry White Chocolate Chip Waffles

Ingredients:

  • 2 eggs
  • 1 1/2 cups warm milk
  • 1/3 cup butter, melted
  • 1/2 cup sugar
  • 2 teaspoons vanilla extract
  • 2 cups all-purpose flour
  • 1 teaspoon salt
  • 4 teaspoons baking powder
  • 1/2 cup white chocolate chips
  • 1/3 cup dried cherries

Directions:

In a large bowl, whisk together eggs, milk, butter, sugar, and vanilla extract. Sift in the flour, salt, and baking powder, and whisk until smooth. Add white chocolate chips and dried cherries.

Batter

Pre-heat your waffle iron and spray with non-stick spray. Ladle batter onto the waffle iron.

Loaded waffle maker

Note: Cherries and chocolate chips will tend to sink to the bottom so be sure to give the batter a good stir and scoop up from the bottom each time you load the waffle maker.

Cook waffles until golden brown and crispy. Serve plain or with butter and maple syrup.

Crispy Waffle

Helpful Tip: Set your oven to the warm setting and place a cookie sheet in the oven while you’re making waffles. Just pile up the waffles on the cookie sheet and then the whole stack will be nice and warm when it’s time to serve.

This recipe is super easy and I often double it so I can freeze extra waffles. Just pop a frozen waffle in the toaster and you’ve got a quick and tasty breakfast.

Plated waffles

Chicken Tostadas

I love TexMex and try to make it a TexMex night at least once a week. Chicken Tostadas are super tasty and a quick and easy dinner option. Paired with a guacamole salad or fiesta rice, a flavor-packed TexMex dinner can be on your table in 30 minutes or less! I always make extra of this tasty filling to have for lunch the next day, wrapped up in a burrito or as a taco salad.

chicken tostadas

Chicken Tostadas
Makes 12 chicken tostadas

Ingredients:

  • 2 tablespoons olive oil
  • 8 ounces of boneless, skinless chicken, cut into bite-sized pieces
  • 1 small onion, diced
  • 4 garlic cloves, minced
  • 1 cup chunky salsa
  • 1/2 packet taco seasoning
  • 1 16 ounce can refried beans
  • 12 tostada shells
  • 1 large tomato, diced
  • 8 ounces Mexican blend shredded cheese
  • 8 ounces sour cream
  • 1 jalapeño, diced optional

Directions:

Add olive oil to a skillet over medium-high heat and sauté chicken and onion for 2-3 minutes or until chicken is mostly cooked but still a little pink.

Chicken and garlic

Stir in garlic cloves, salsa, and taco seasoning and cook for an additional 5 minutes to finish cooking the chicken and for the sauce to thicken.

Salsa chicken

Remove from heat.

In a microwave-safe bowl, heat the refried beans.

To assemble tostadas, spread a thin layer of beans on a tostada shell.

Beans on tostada

Add a few spoonfuls of the chicken mixture.

Chicken on tostada

Finish by topping with cheese, tomato, sour cream, and jalapeño. So easy and so yummy!

chicken tostadas

Decadent Hot Fudge Cake

The name says it all. What’s not to love about hot fudge in the form of a cake? Trust me when I say you’ll be tempted to grab a spoon and sit down in front of the couch with the entire pan and go to town. If you’re having one of those days, awesome or terrible, this is the ultimate decadent dessert—rich, gooey, and pure chocolate decadence!

I originally saw this recipe in a magazine a few years ago and when I read through it thought it was a mistake. The ingredients and instructions don’t seem to work. I was curious so decided to give it a try and boy was I wrong! So stinkin’ good! I’ve tweaked it over time to make it even more chocolatey and hope you’ll give it a try. This is the ultimate chocoholic’s cake.

Hot Fudge Cake

Decadent Hot Fudge Cake
Serves 8 (or 1 if it’s a Friday night on your own)

  • 1 cup flour
  • ¾ cup sugar
  • 6 tablespoons cocoa, divided
  • 2 ounces unsweetened baking chocolate, melted (the better the chocolate, the better the cake! I go for Ghirardelli or Scharffen Berger)
  • ¼ teaspoon salt
  • ½ cup milk
  • 2 tablespoons canola oil
  • 2 teaspoon vanilla
  • 1 cup packed brown sugar
  • 1 ¾ cups hot water
  • Ice cream or whipped cream, optional

Preheat oven to 350°F.

In a bowl, sift flour, sugar, 4 tablespoons cocoa, and salt and mix until blended. Set aside.

In a large bowl, whisk together milk, oil, melted chocolate, and vanilla. Add flour mixture.

Add flour

Note that it will appear quite dry and lumpy so I recommend mixing together with a potato masher or using the bread paddle on a mixer.

potato masher

Transfer to a 9” square baking dish and spread batter out with a spatula.

In a small bowl, whisk together remaining 2 tablespoons cocoa, brown sugar, and hot water. Pour over batter but do not stir.
Pour chocolate

Bake 35-40 minutes.
Baked Cake

Serve warm with a scoop of ice cream or dollop of whipped cream.

Banana Streusel Muffins

Too often, I find myself staring at sad bananas that are way past their good-to-nom date. That’s when I whip up a batch of banana streusel muffins. They are spicy, nutty and full of that yummy banana flavor that only sad bananas know how to bring to a party. The walnut streusal topping takes these to the next dimension of awesome. Did I mention they are wicked easy to make?

Banana Streusel Muffins
Makes 24 muffins

Banana Streusal Muffins

Ingredients:
1-1/2 cups white sugar
2 eggs
2/3 cup butter, melted
6 very ripe bananas
2 teaspoons vanilla
3 cups all-purpose flour
2 teaspoons baking soda
2 teaspoons baking powder
1 teaspoon salt
1/2 teaspoon nutmeg
1 teaspoon cinnamon

Streusal Topping:
1/4 cup all-purpose flour
2/3 cup packed brown sugar
1/4 teaspoon ground cinnamon
1/2 cup finely chopped walnuts
2 tablespoons butter, melted

Preheat oven to 375°F. Grease or spray a muffin tin.

Muffin Tin

In a large bowl, mix together sugar, eggs, and melted butter. Add in bananas and mix until smooth. If mixing by hand, a potato masher is very helpful in mashing up the bananas.

Banana batter

Add the flour, baking soda, baking powder, salt, nutmeg, and cinnamon. Mix until the batter is moistened and the dry ingredients are all incorporated.

Finished Batter

Pour batter into muffin tin, leaving room for the streusal topping.

Streusal Topping:
In a small bowl, mix the flour, brown sugar, cinnamon, walnuts and butter together with a fork, until crumbly.

Streusal

Scoop a small spoonful of streusal on top of each muffin.

Topped Muffins

Bake in preheated oven for 18-20 minutes, or until a toothpick inserted into the center comes out clean. Allow muffins to cool completely before eating.

Banana Streusal Muffins

Yay for sad bananas!

Sad Bananas

Hungarian Mushroom Soup

It’s been a rainy and dreary couple of days here in Charleston so perfect weather for curling up with my pugs and a book and making some soup. My Papa actually shared this recipe for Hungarian Mushroom Soup. He had it at a restaurant a few weeks ago, went crazy for it so made it at home for the family. I couldn’t stop thinking about it so this icky weather was just the necessary push to make a pot of my own. I made it for dinner and it was phenomenal! The richness of this mushroom soup really comes out with the flavors of parsley, dill, lemon and Hungarian paprika.  Definitely one to add to the recipe book for cold or rainy days.

Plated Soup

Hungarian Mushroom Soup
Serves: 6

Ingredients:

4 tablespoons butter
1 large onion, finely diced
5 cloves garlic, minced
1 pound fresh mushrooms, sliced
2 teaspoons dried dill weed
2 tablespoons Hungarian paprika
1/4 teaspoon cumin
3 tablespoon soy sauce
2 cups chicken broth
1 cup milk
3 tablespoons all-purpose flour
2 teaspoon salt
ground black pepper to taste
2 teaspoons lemon juice
1/4 cup chopped fresh parsley
1/2 cup sour cream

Heat a large soup pot over medium heat and melt butter. Add onions and sauté for 5 minutes, stirring regularly.

Onions

Add mushrooms and garlic and sauté an additional five minutes, stirring regularly.

Mushrooms

Mushroom and spices

Stir in dill, paprika, cumin, soy sauce, and broth. Reduce heat to low, cover, and simmer for 15 minutes.

Broth simmer

In a small bowl, whisk together flour and milk and add to soup.

Milk

Cover and simmer for an additional 15 minutes, stirring occasionally.

Milk 15 min

Turn off the heat and add salt and pepper, lemon juice, parsley and sour cream.

Parsley

Mix together until incorporated. Serve soup in bowls with a dollop of sour cream, a dash of paprika and parsley for color, and a crusty wheat or french bread for dipping.

Plated Soup

This soup is so good that you’ll start wishing for cold and rainy days! Many thanks to my Papa (@LifeCoach4Men) for another amazing recipe!

Baby Blueberry Key Lime Pies

I came up with this recipe when I couldn’t decide between making a blueberry pie and a key lime pie. I tend to be more partial to blueberry but my boyfriend is smitten by all things key lime. So I resolved that inner conflict by inventing one that marries the two favorites. The result was amazing and I was delighted by the beautiful color (purple is my favorite!).

This recipe is about the easiest and quickest dessert recipes in my inventory but it looks and tastes a lot more involved. I love sneaky recipes like this one! 🙂

While you can certainly use this recipe to fill a large pie shell, there’s really fun about presenting each of your guests with their own baby pie. This is also a great recipe for baby showers or other parties; it’s a cinch to double and they hold up really well.

Baby Blueberry Key Lime Pies

Baby Blueberry Key Lime Pies
Makes 12 baby pies or 1 large pie

Ingredients

  • 1 pint fresh blueberries
  • 1 cup key lime juice
  • 1 tablespoon grated lime zest
  • 2 (14 ounce) cans sweetened condensed milk
  • 1/2 cup sour cream
  • 12 miniature graham cracker crusts

Preheat oven to 350°F.

In a small pan over medium high heat, combine blueberries and lime juice and bring to a boil. Reduce and simmer for 2-3 minutes until the blueberries start to soften.

Blueberry & Lime Juice

Remove from heat and cool in the refrigerator.

In a medium bowl, mix together the lime zest, sweetened condensed milk, and sour cream.

milk and lime

Add the cooled blueberry mixture and mix until smooth. Check out that gorgeous color!

blueberry lime mixture

Pour the mixture into the prepared graham cracker crust. Be sure to fill as closely to the top as possible. They will settle down a bit during baking.

Filled pies

Bake baby pies in preheated oven for 15 minutes. Remove from oven and let cool. Be sure to chill in the refrigerator before you serve as they taste best chilled. Garnish with lime slices and/or whipped cream and serve.

Plated Pies

Creamy Parmesan Tilapia

I love fish and while I’m not as comfortable cooking with it as I am with poultry and red meat, I’m learning and experimenting. After trying a similar recipe that turned out okay, I did some tweaking and the result was my Creamy Parmesan Tilapia, which has become an instant hit. I love this recipe because it’s deliciously simple and on the table in practically no time at all! It definitely works well as a busy weekday dinner. Plus, it uses up ingredients we almost always have on hand so there’s no mad dash to the store to pick up anything up.

Creamy Parmesan Tilapia
Serving Size: 4

Plated Tilapia

Ingredients

  • 4 (4-6 ounce) fresh tilapia filets
  • 1/2 teaspoon lemon pepper
  • Salt & Pepper to taste
  • 1/4 cup mayonnaise
  • 1/2 cup Parmesan cheese
  • 1 lemon, juiced
  • 1/4 cup seasoned panko breadcrumbs
  • 1/2 teaspoon fresh parsley, chopped

Directions

Preheat your oven to broil.

In a small bowl, mix together Parmesan cheese, mayonnaise, lemon juice, and a dash of salt & pepper. Set aside.

Parmesan Mayo Mixture

Carefully wash each filet and pat each side down with paper towels.

Fresh tilapia

Line a baking dish with aluminum foil and lay the filets down. Sprinkle each side with salt and lemon pepper.

Lemon Peppered Filets

Broil for 3 minutes. Remove from oven, flip filets, then broil the other side for 3 minutes. Remove from oven.

Briled one side

Spread the Parmesan-mayo mixture over the fillets and broil for 2 minutes. Remove from oven and sprinkle Panko and return to broil for 30 seconds to a minute or until the Panko is nicely browned. Keep a very close eye on it as the broiler has a tendency to go infernal if left unattended.

Broiled Fish

Remove from oven and garnish with fresh parsley and a little extra Parmesan cheese.

Finished fish

I make this once or twice a month and like to pair it with my Veggie Quinoa and a fresh green salad. Such a nice summer meal!

Plated Tilapia